
Its got to be one of life’s most special moments…
Being able to make something from the heart for the one person who makes you complete. The fact that you find that person in the first place is miracle enough but then having the skills and time to make something to show them exactly how much they mean to you? bloody priceless in my book.
To be completely open I think the journey of making something like this is as special as the end result, it means as much to me to make it as it does for Gill to receive, I selfish indulgence if you like….
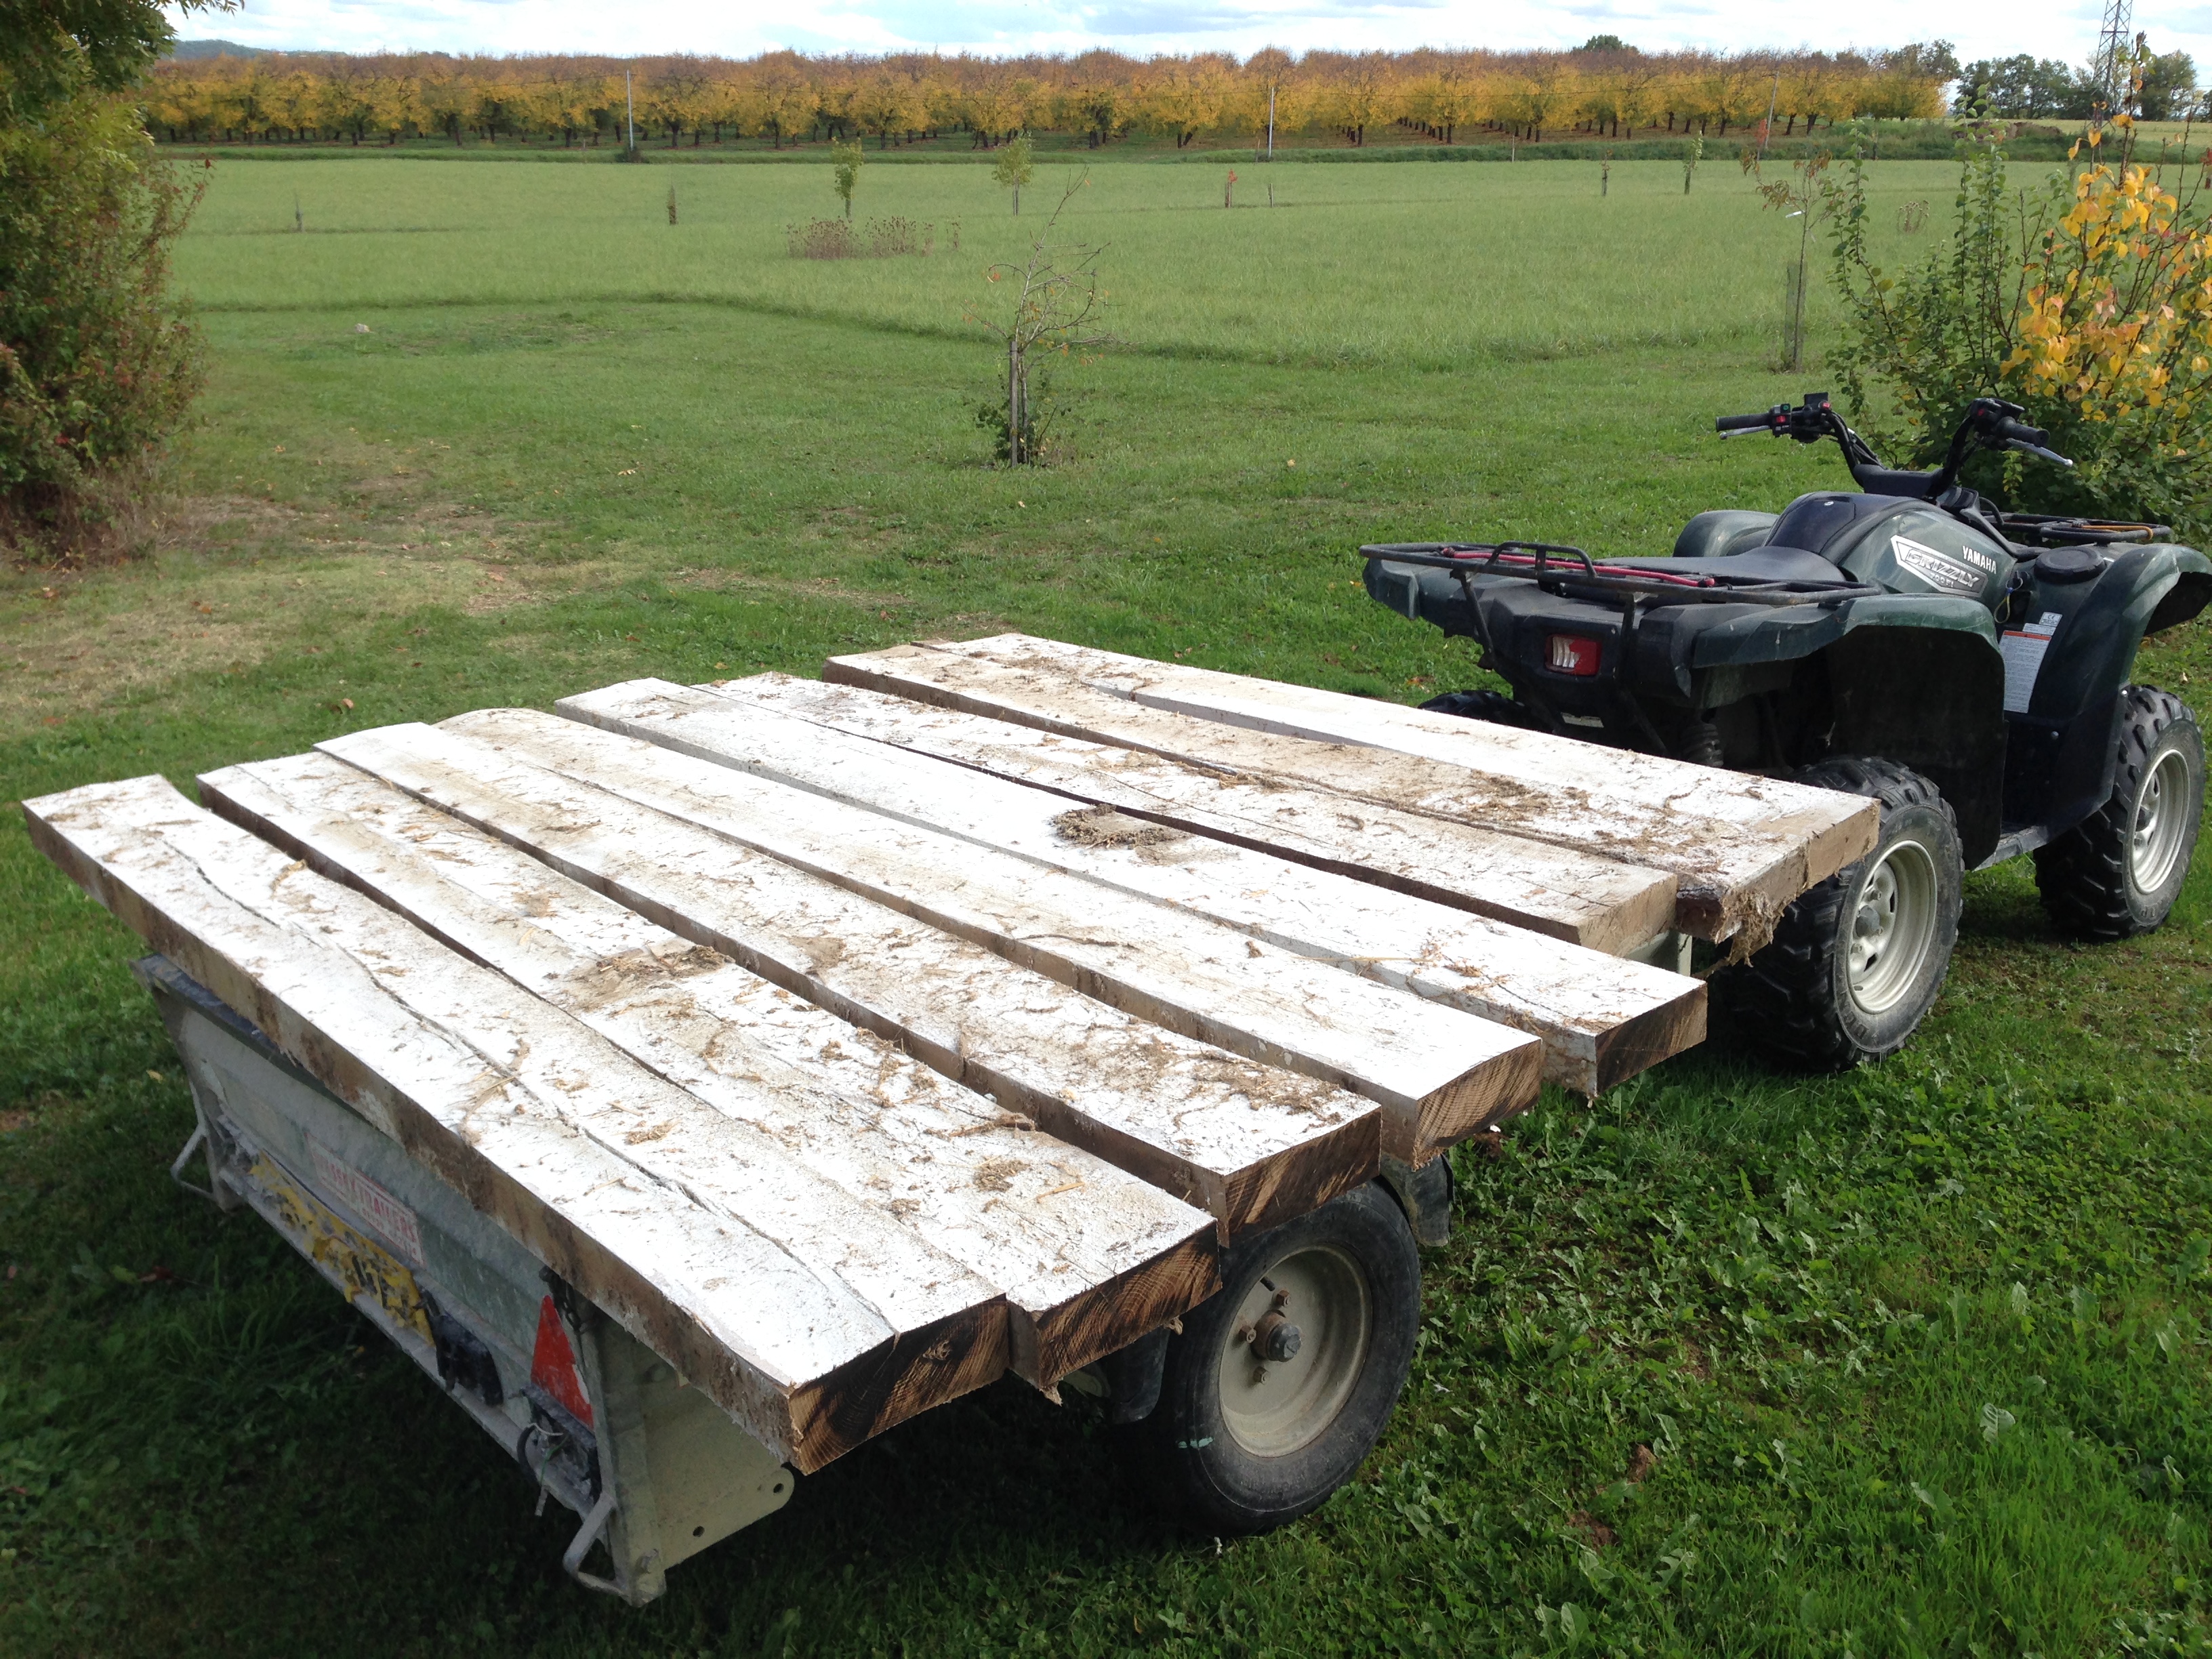
The woods origins a far from pretty and quite hostile, the years of dust kicked up by the removal of boards and joists leaves my air ways blocked and headaches a plenty (even wearing a proper mask) the joists are white from years old lime wash with acted as a sanitiser for the dairy cow barn, this stuff really gets in your head and you’re breathing hard.


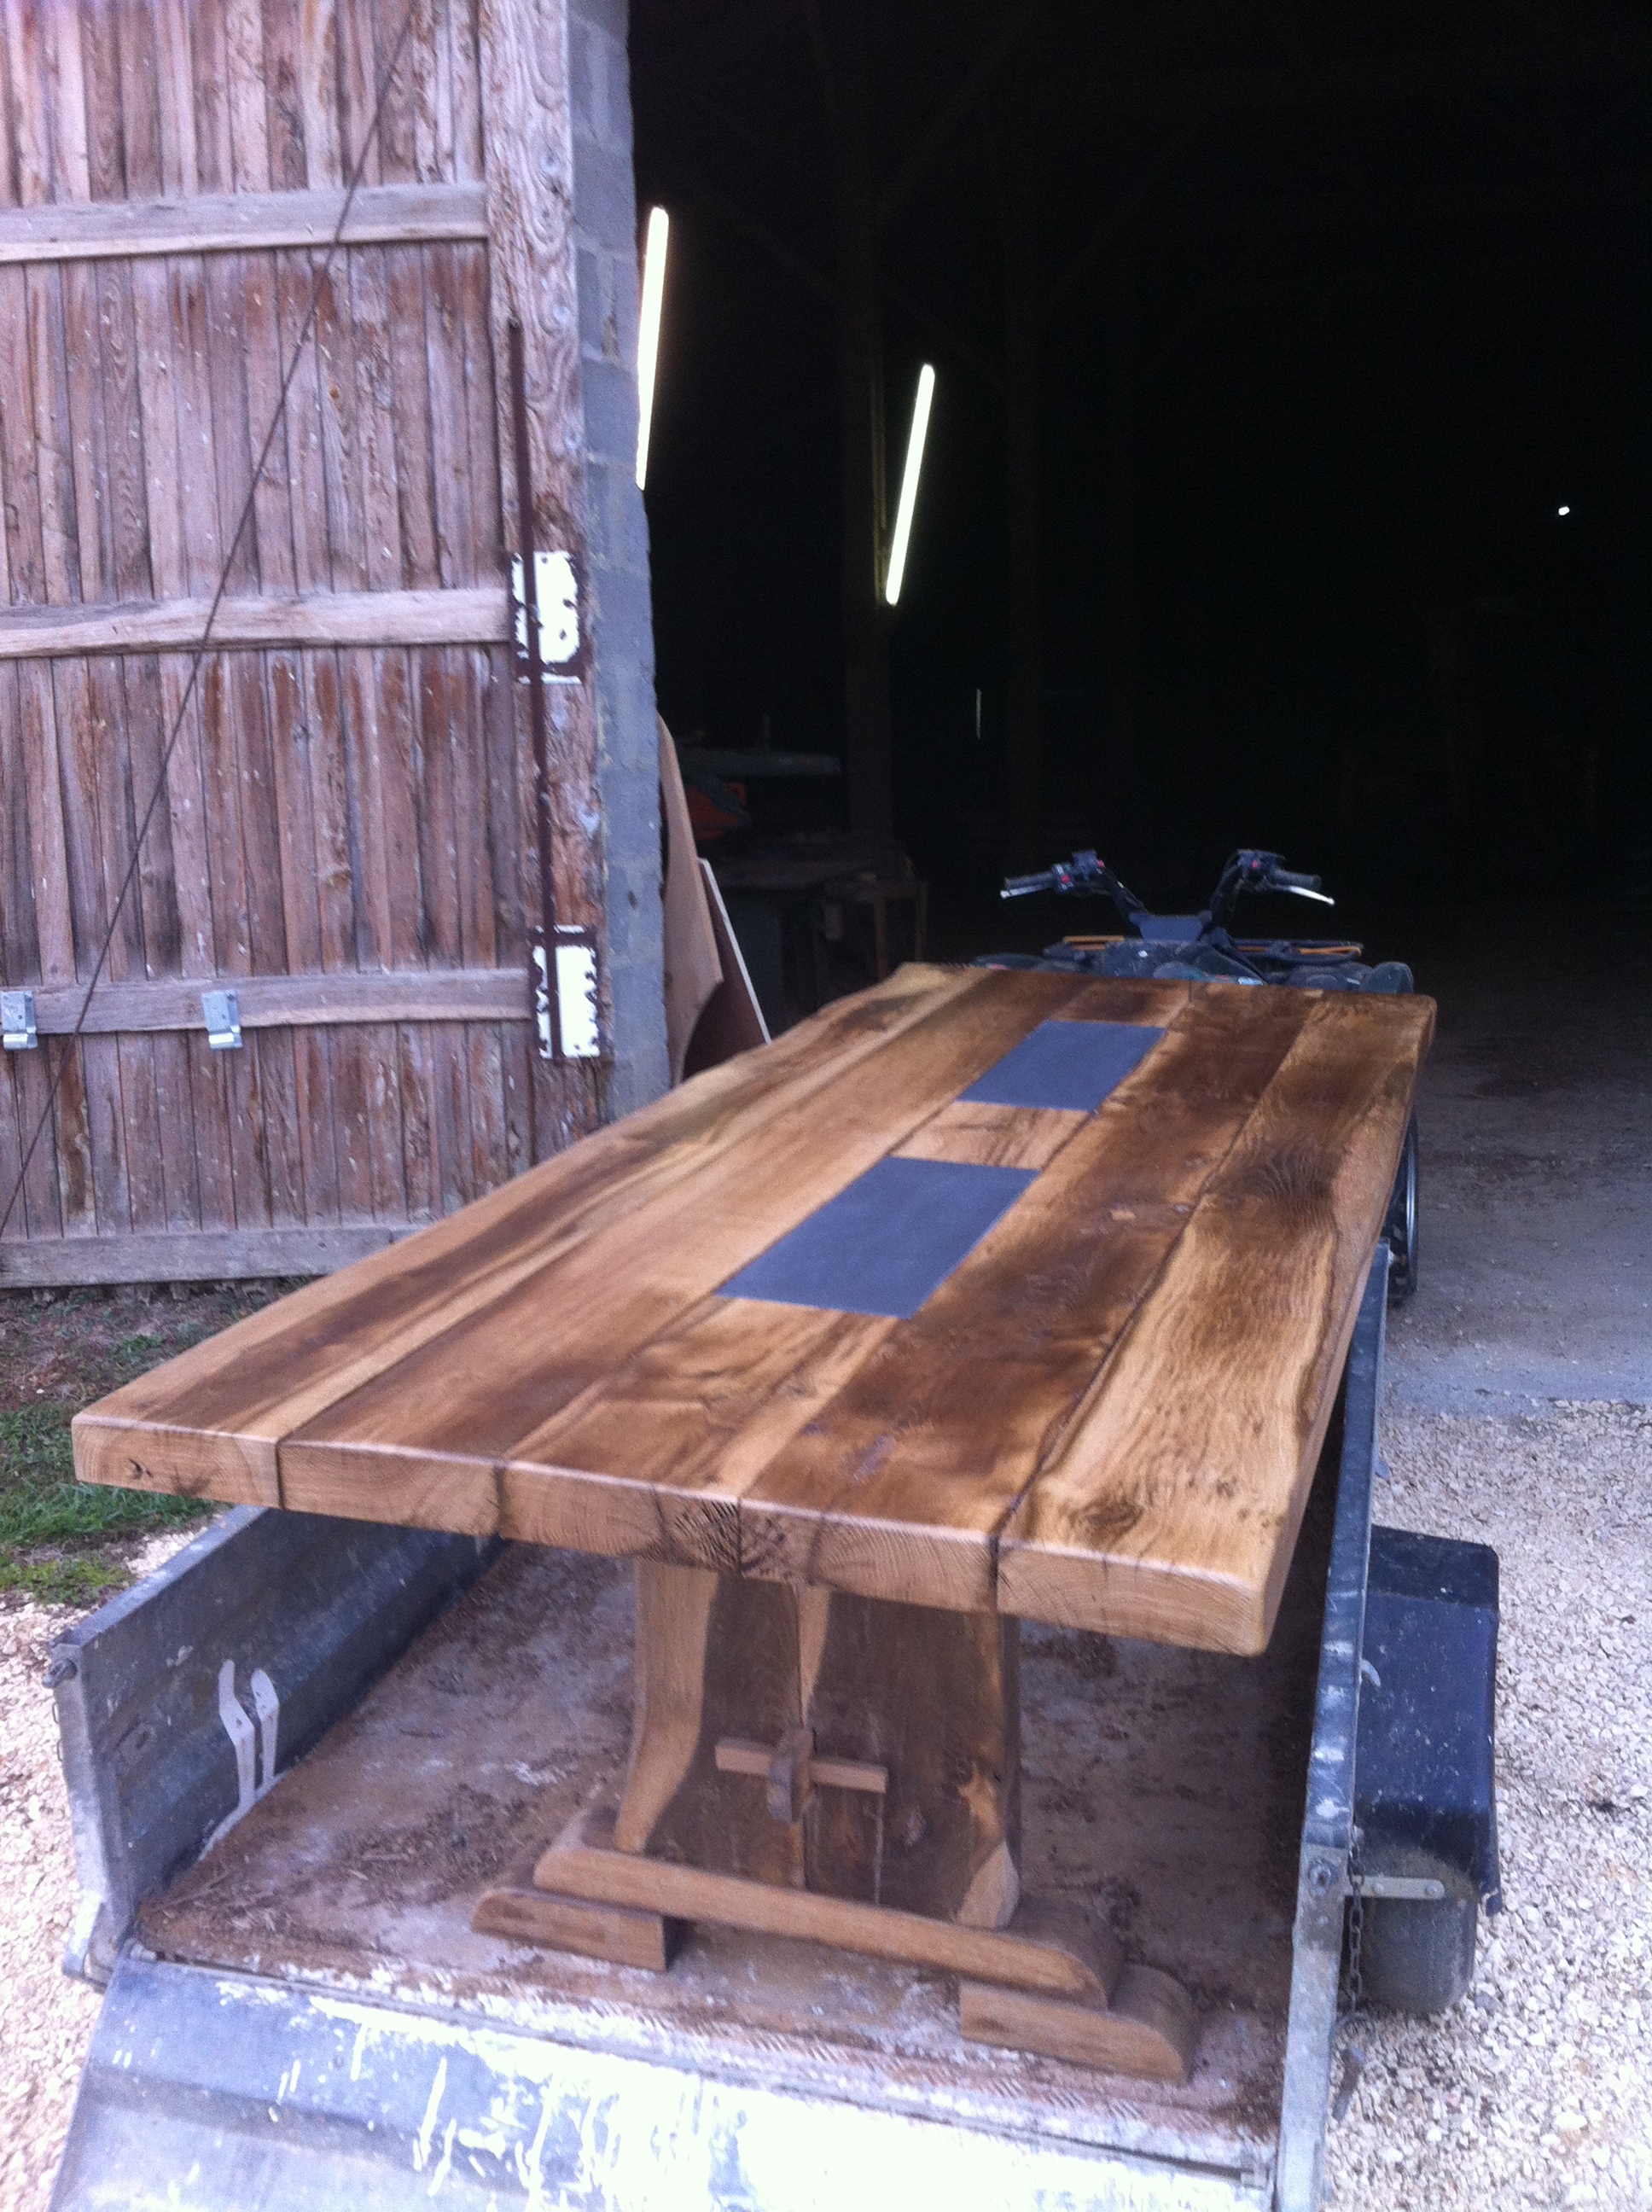
its the joists I want for now as this has to be chunky, 8ft x 4ft Refectory table with slate inserts, these are 6m long 8″ x 3″ solid oak, weight is about 70kg each

all cut to length then move onto the next stage of jet washing
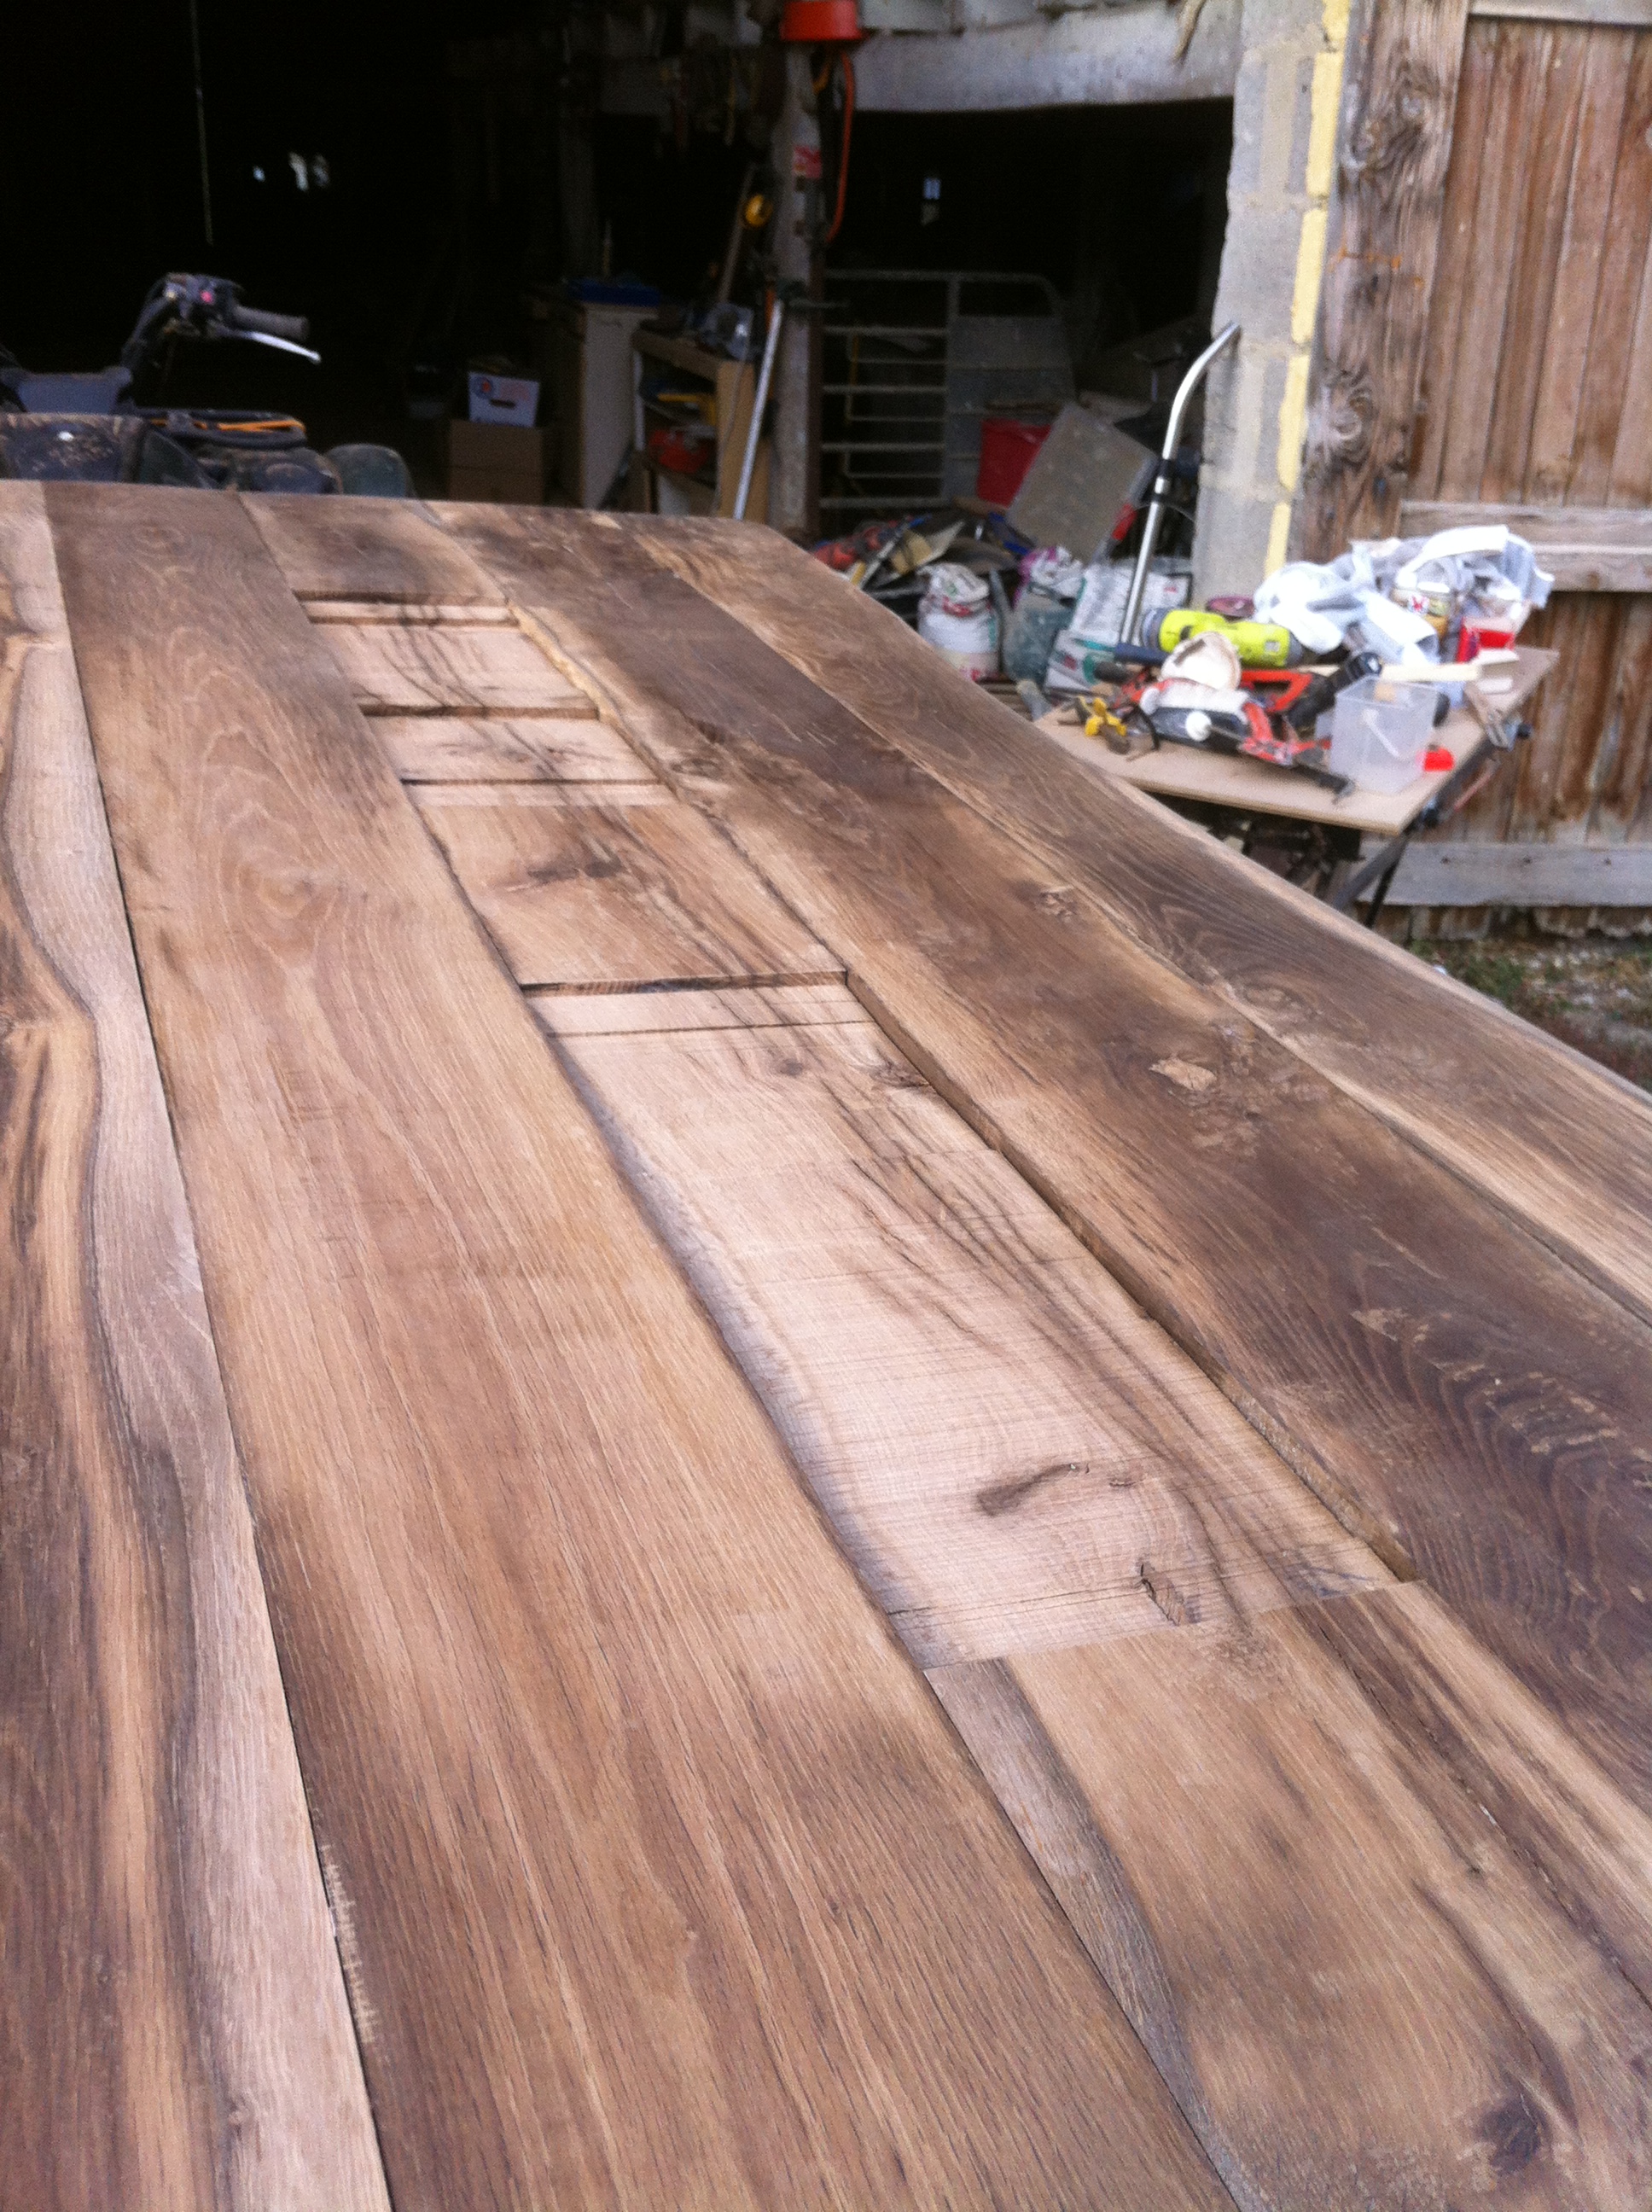
this exposes the grain and lets me decide on their position within the tables structure for aesthetics

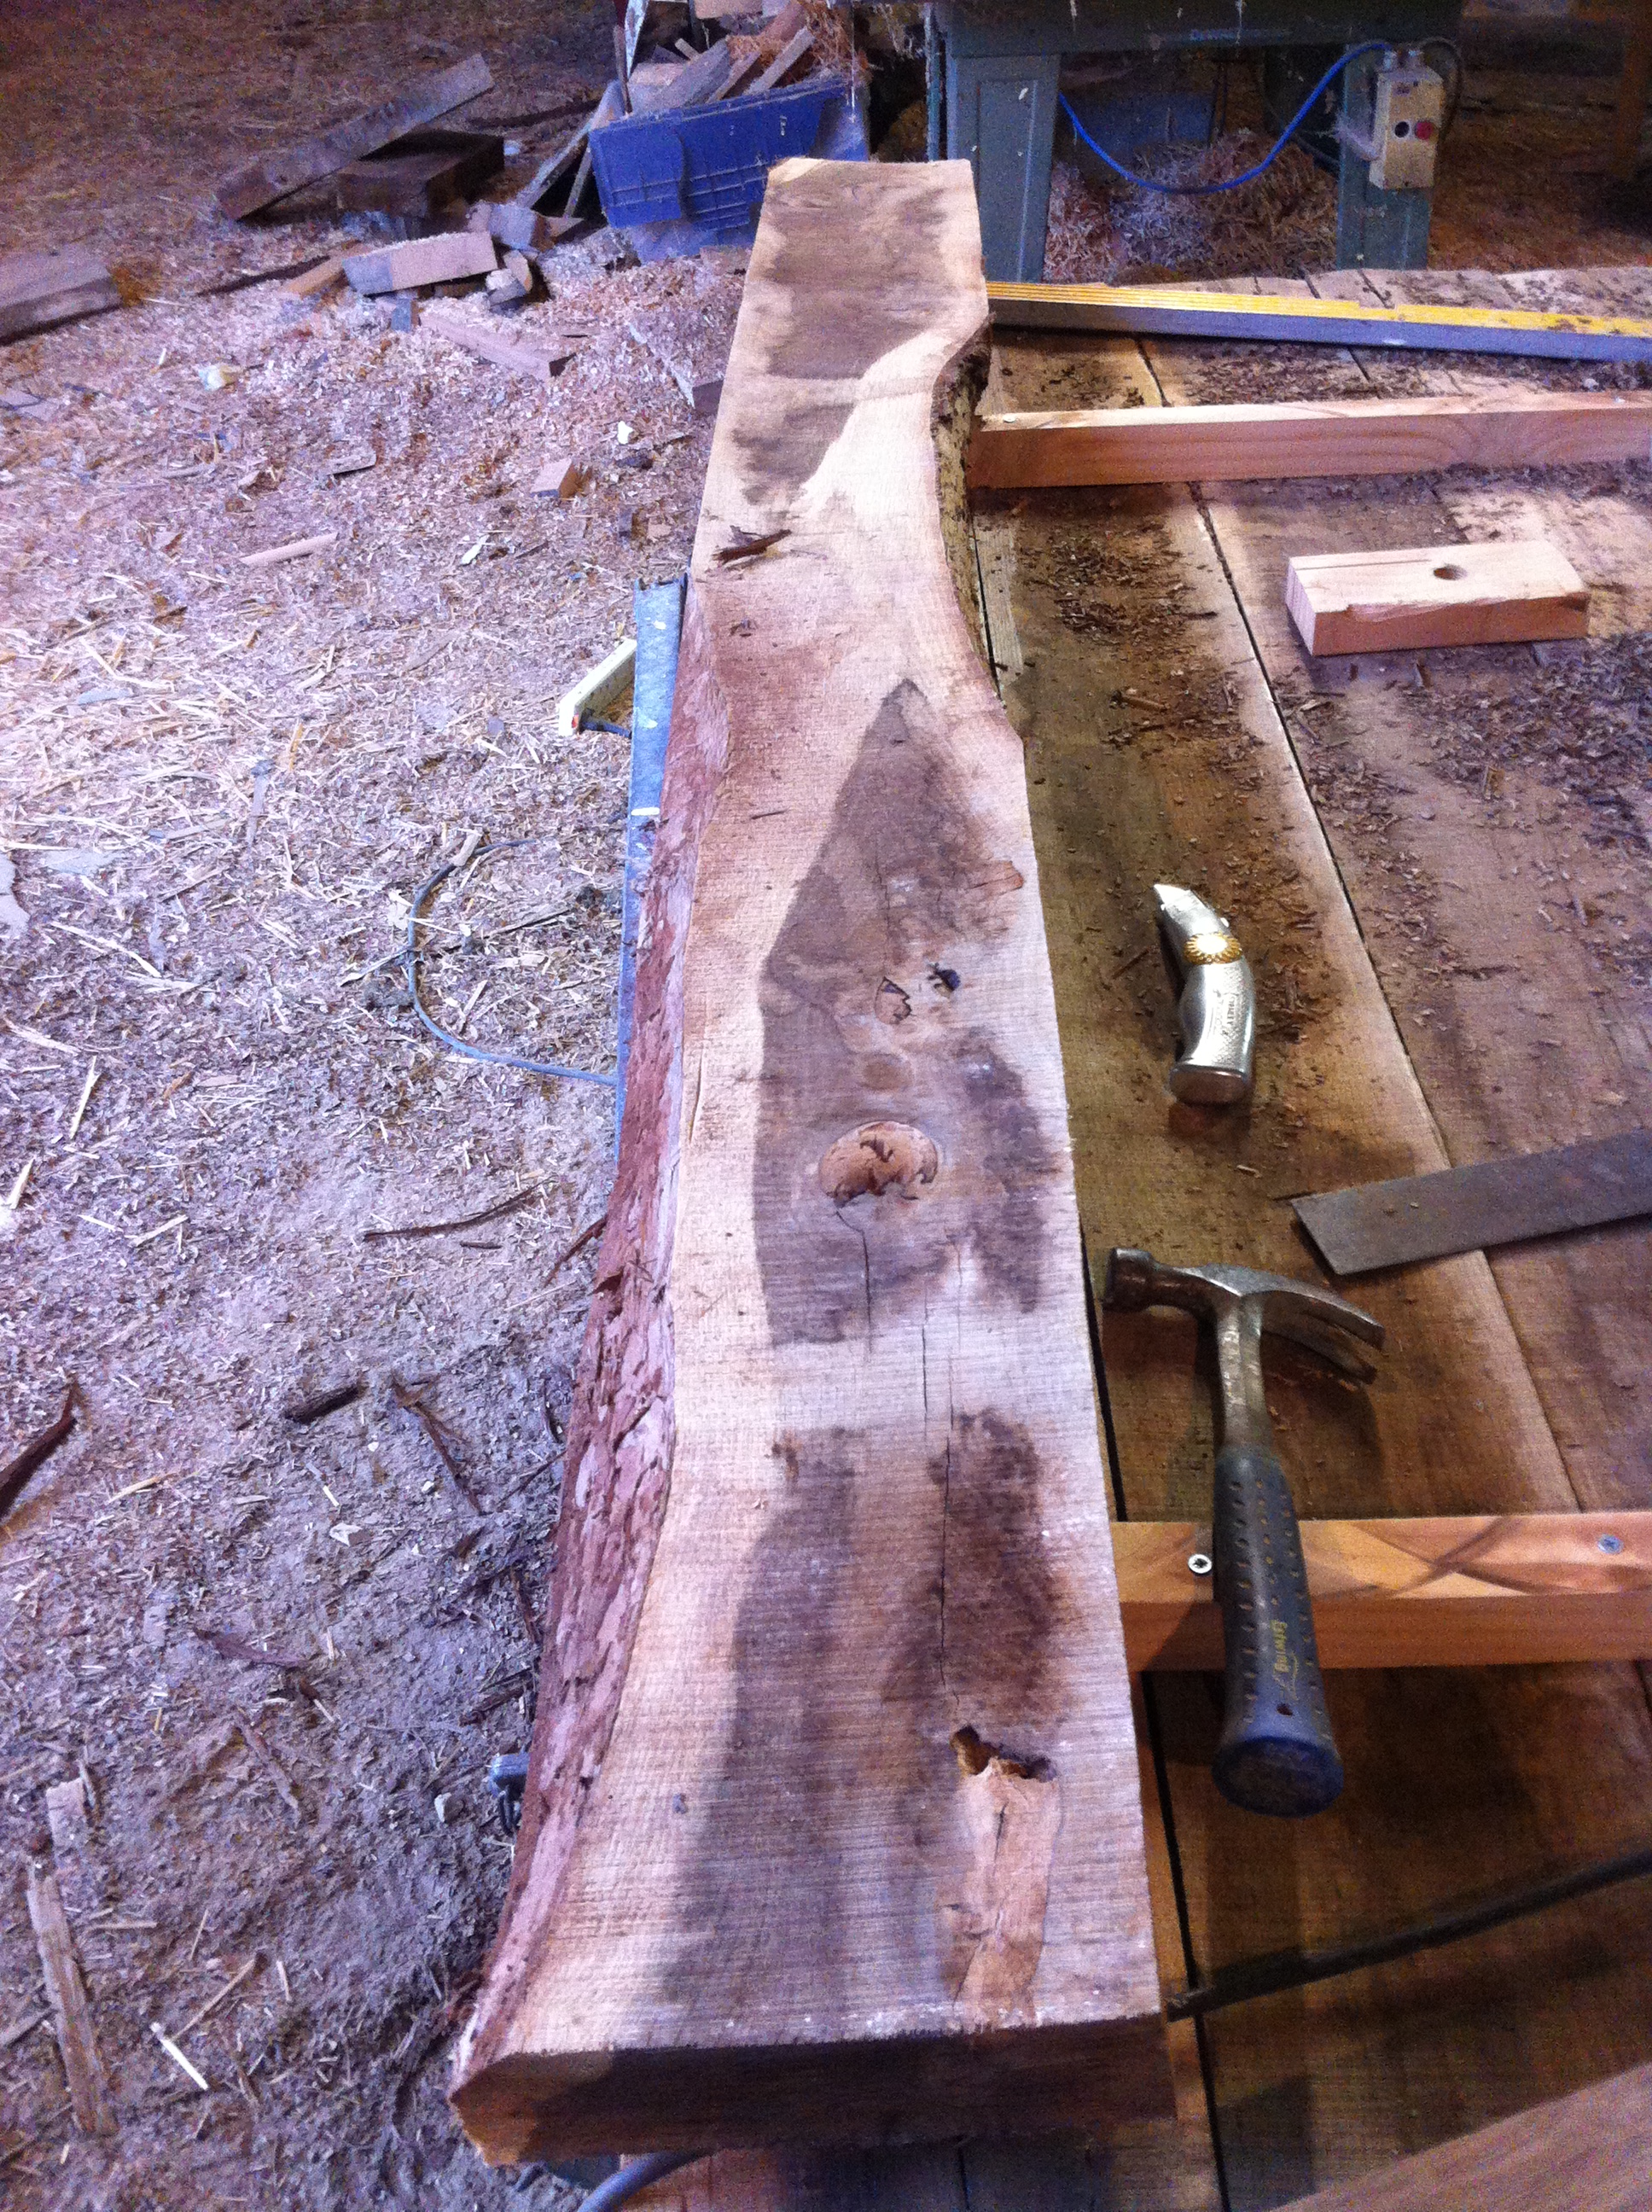
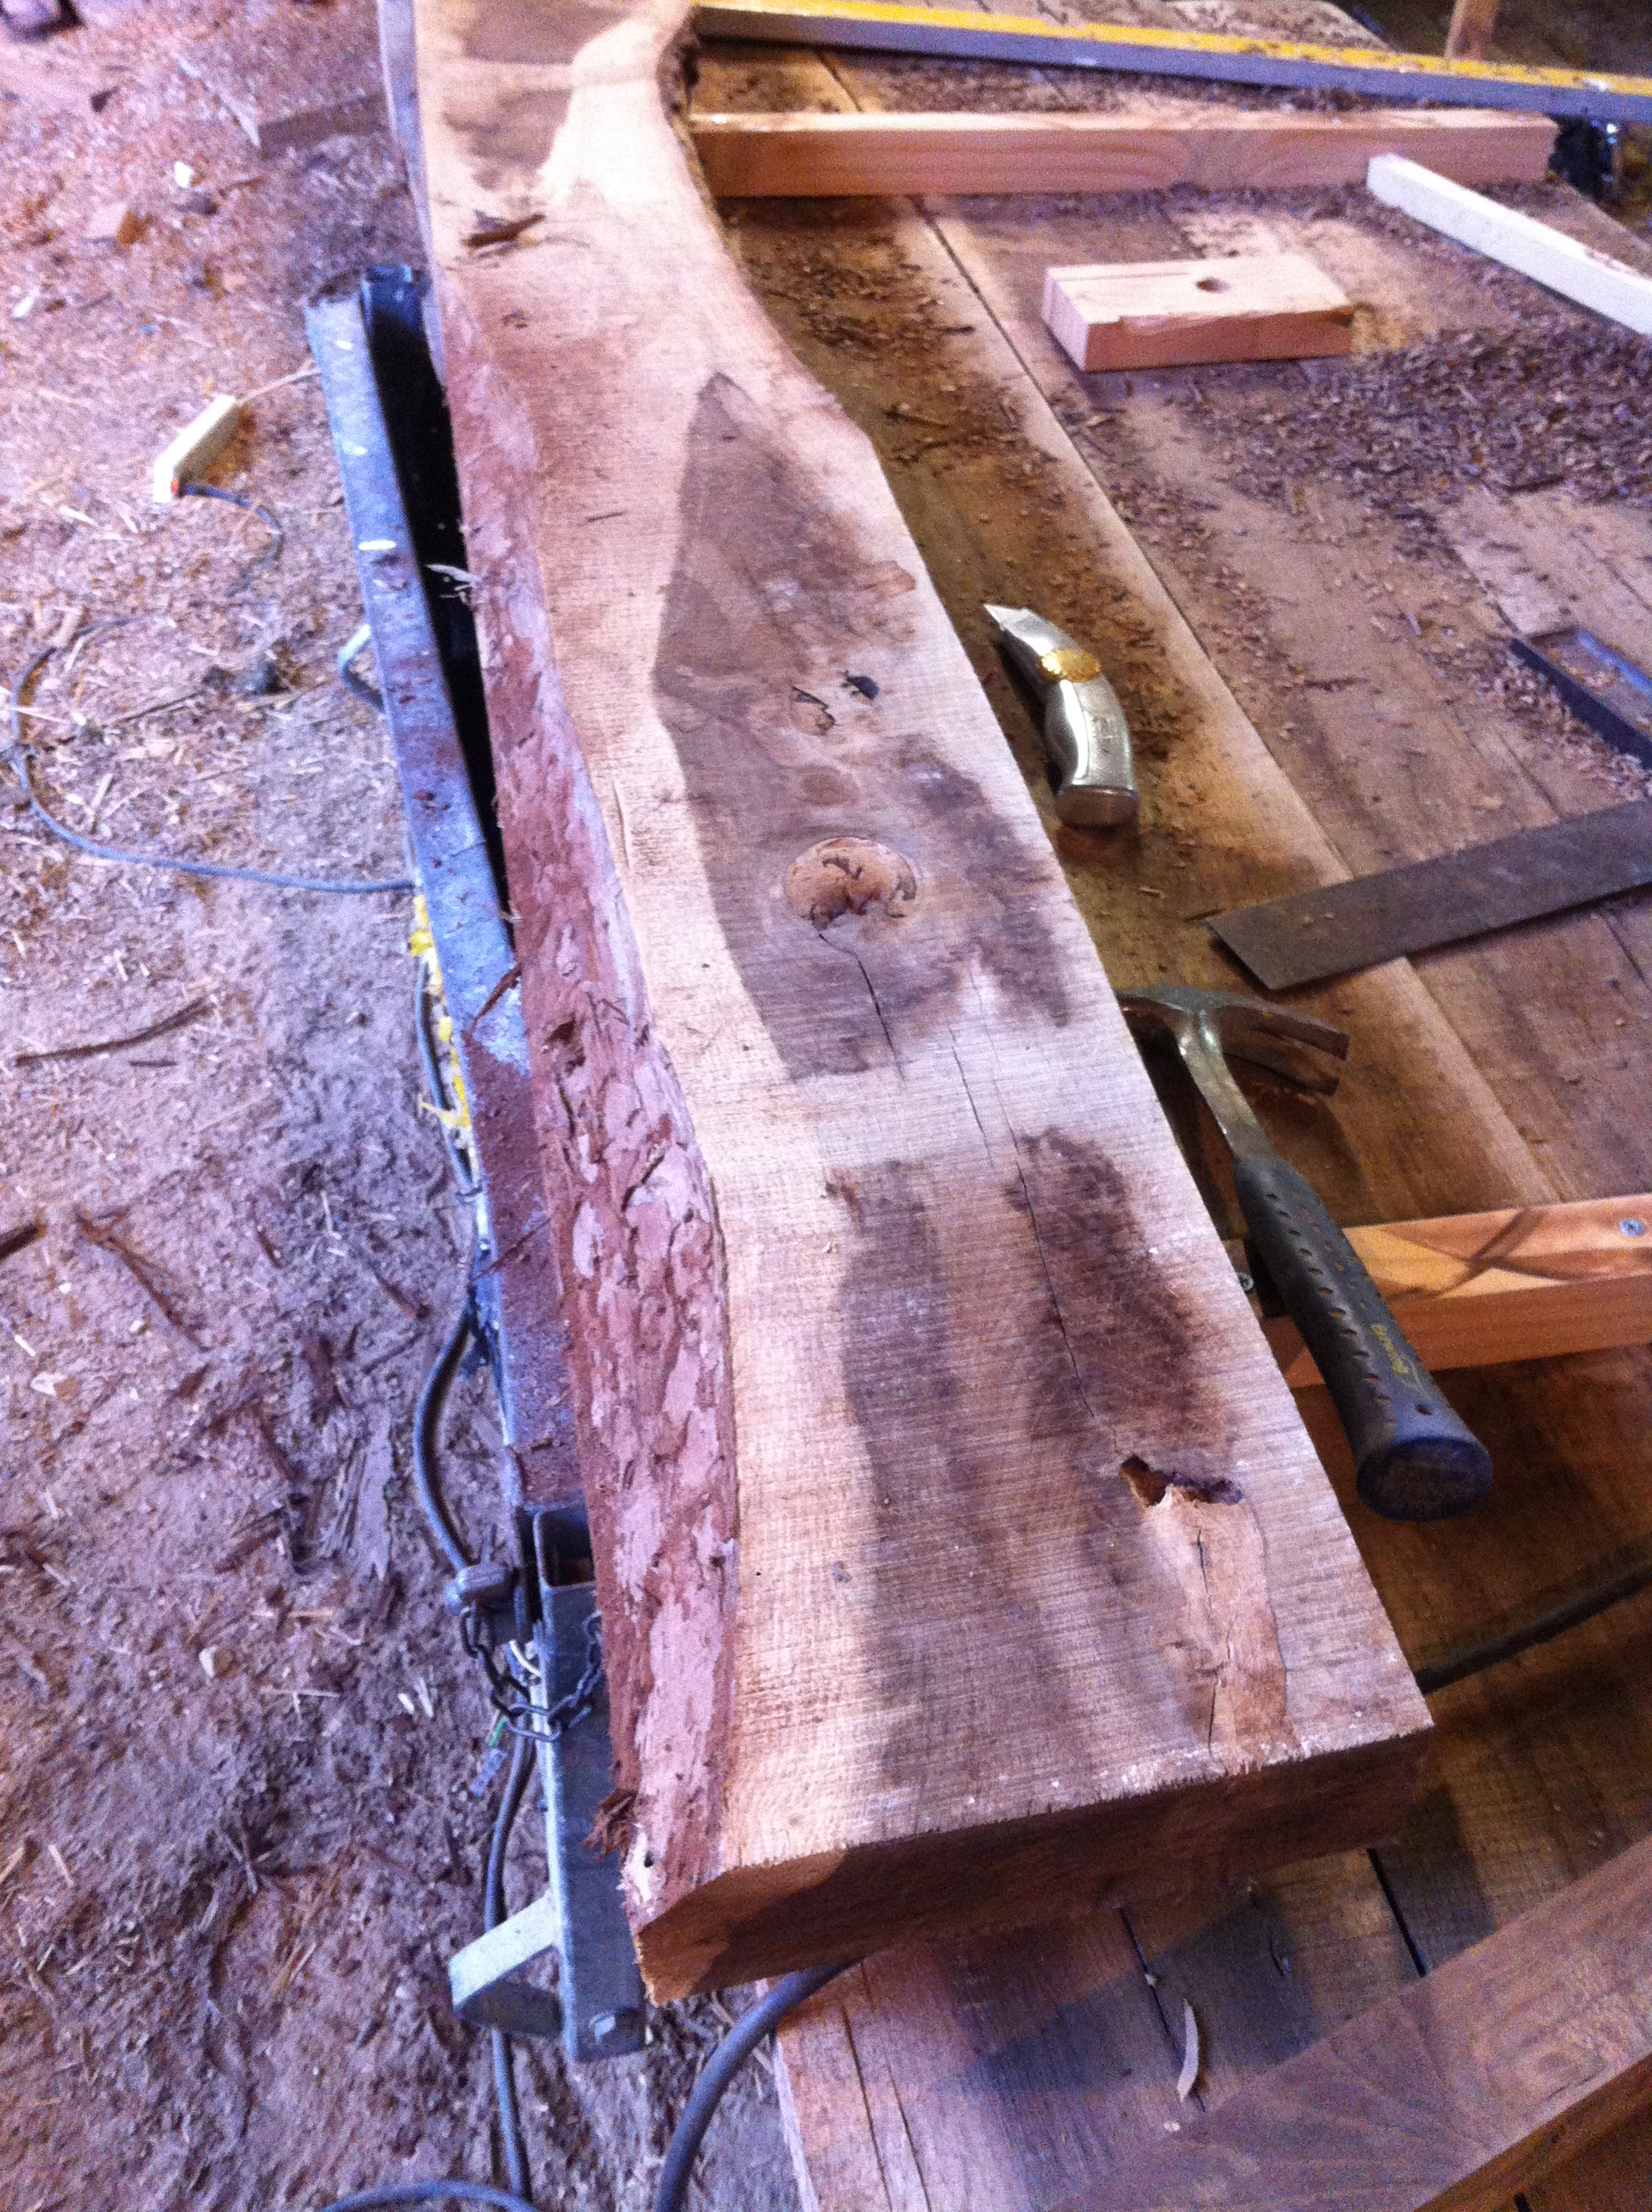
dried out in the sun & back in the workshop i start deciding how they’ll sit together, a couple have some edges with original bark still on which once removed leaves a scalloped edge which will make a lovely leading edge for each side
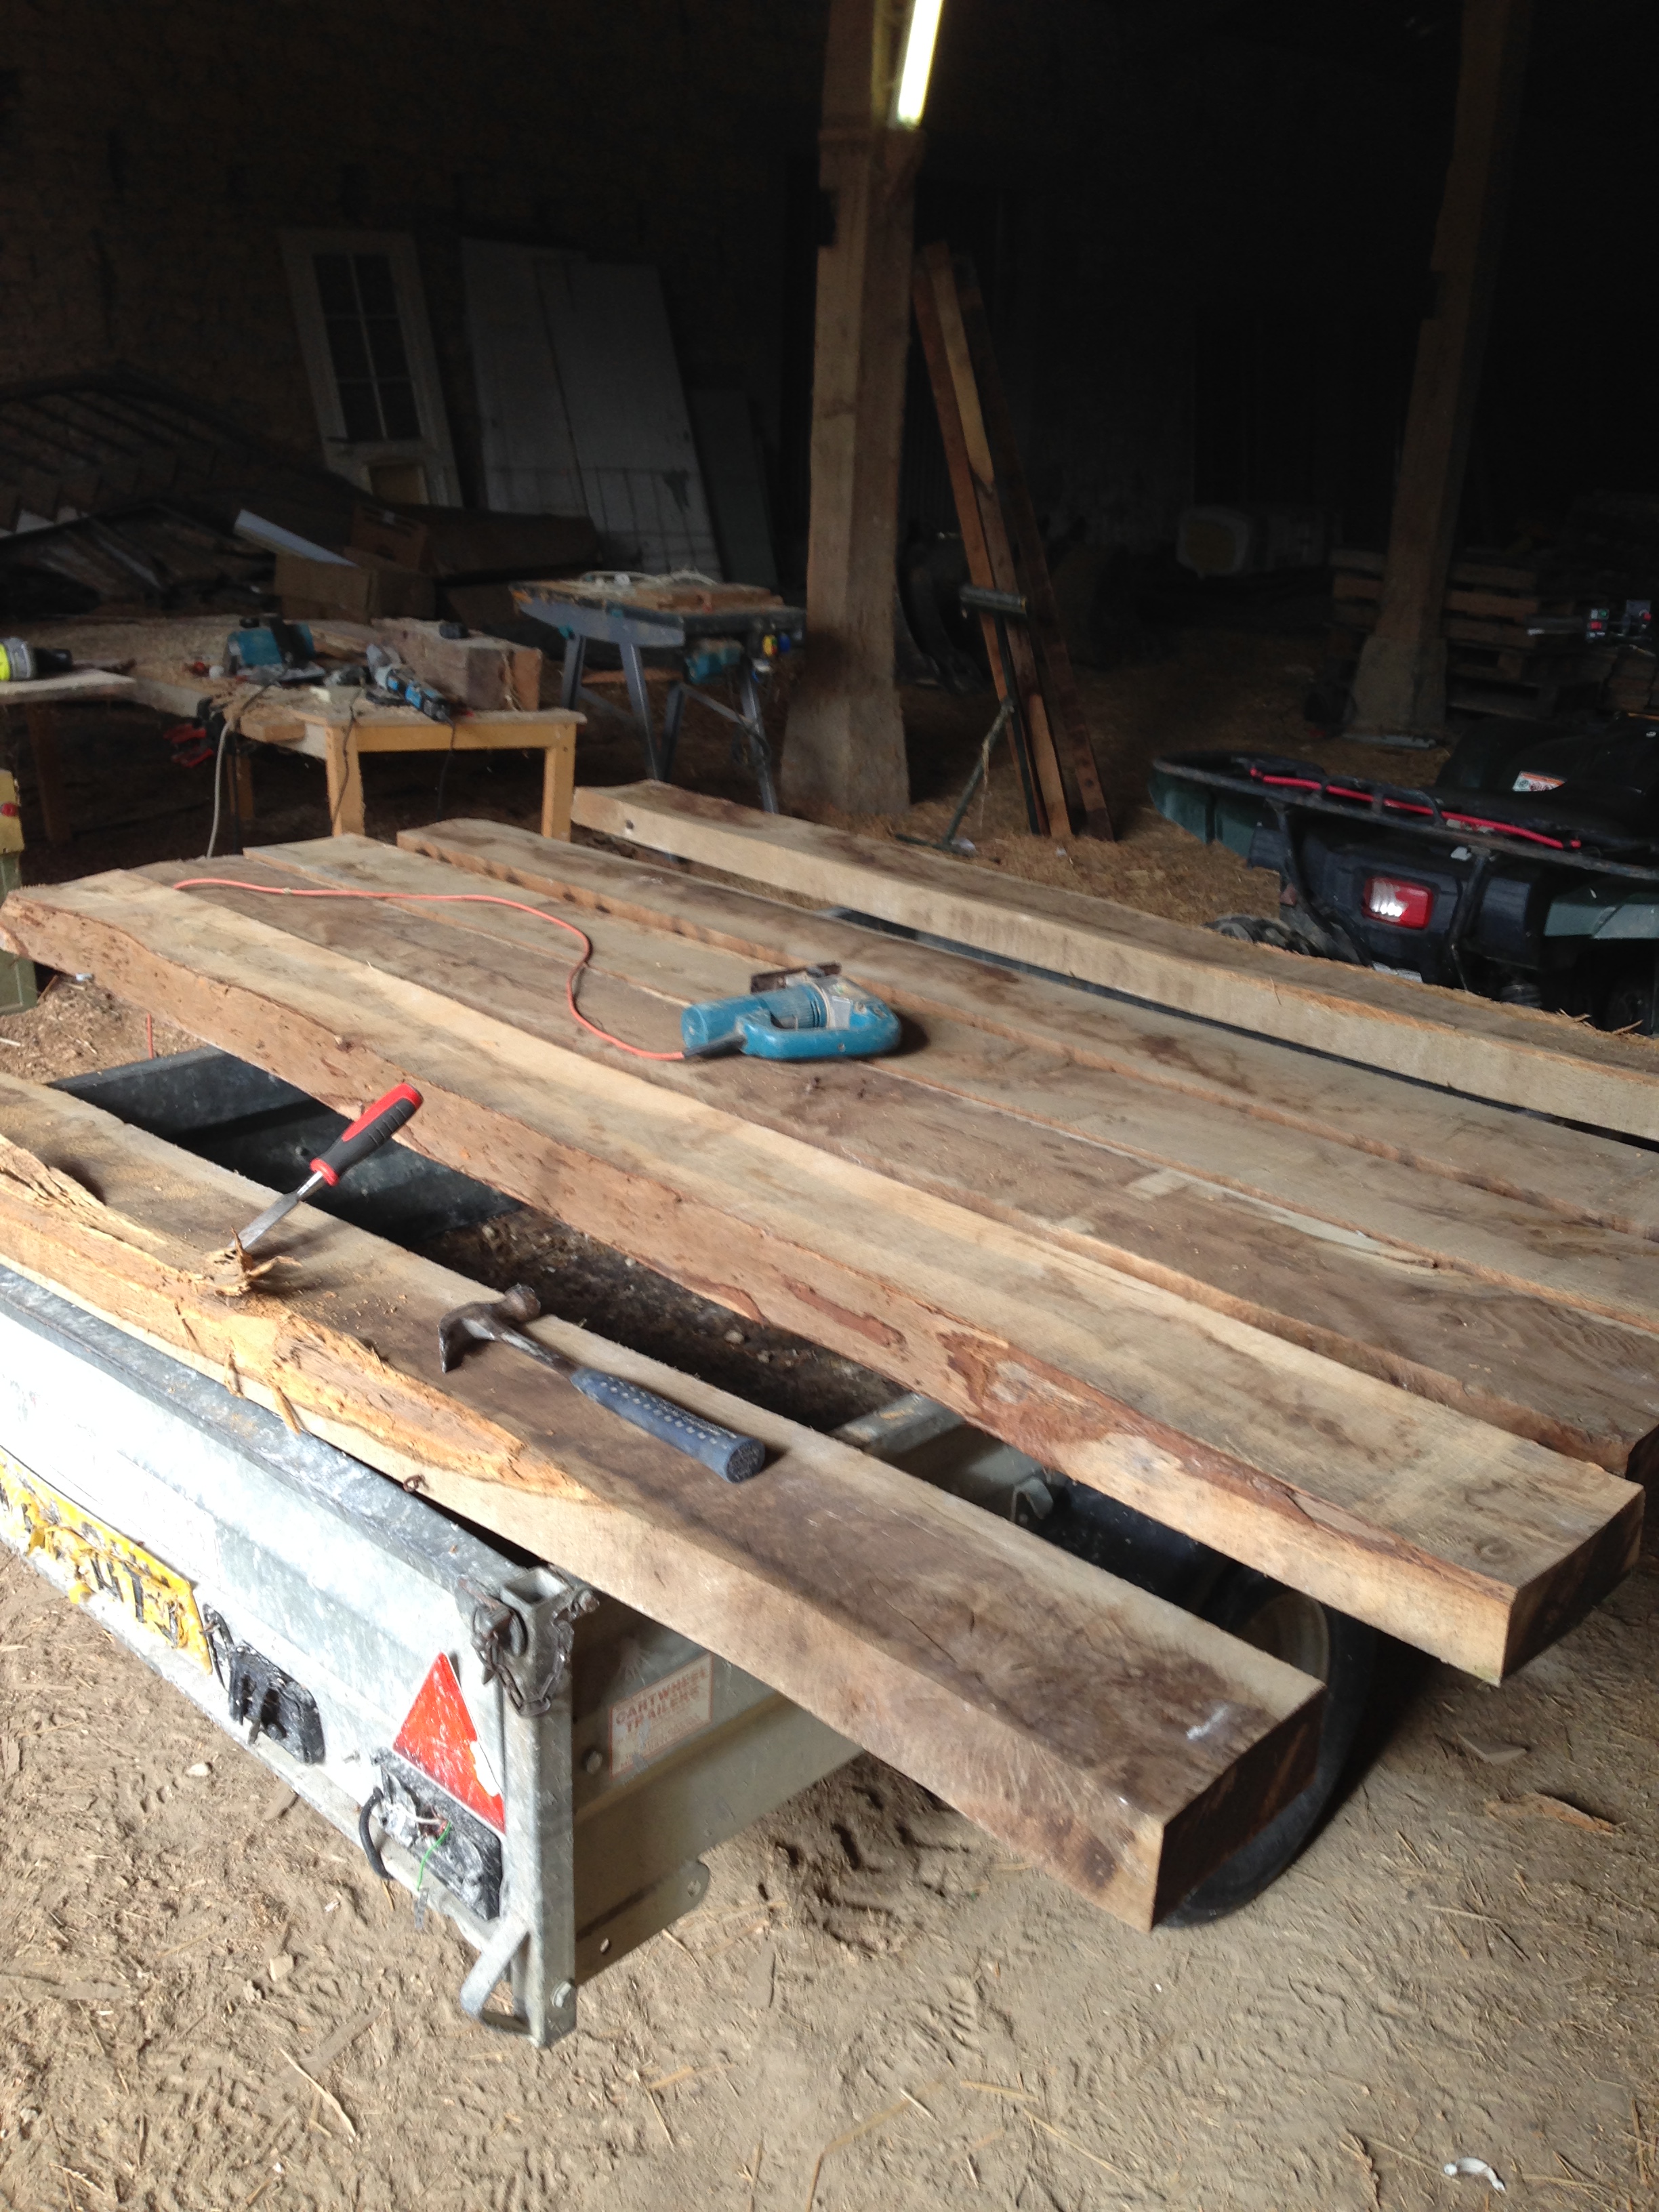
once the arrangement at least for the top was figured out i plane them as close to flat as possible then turn over so they sit on trailer sides creating a flat surface, then plane flat two 3″ channels for upper braces (some temporary softwood ones hold it while i work on the oak replacements)

then onto the main supports

attach to braces
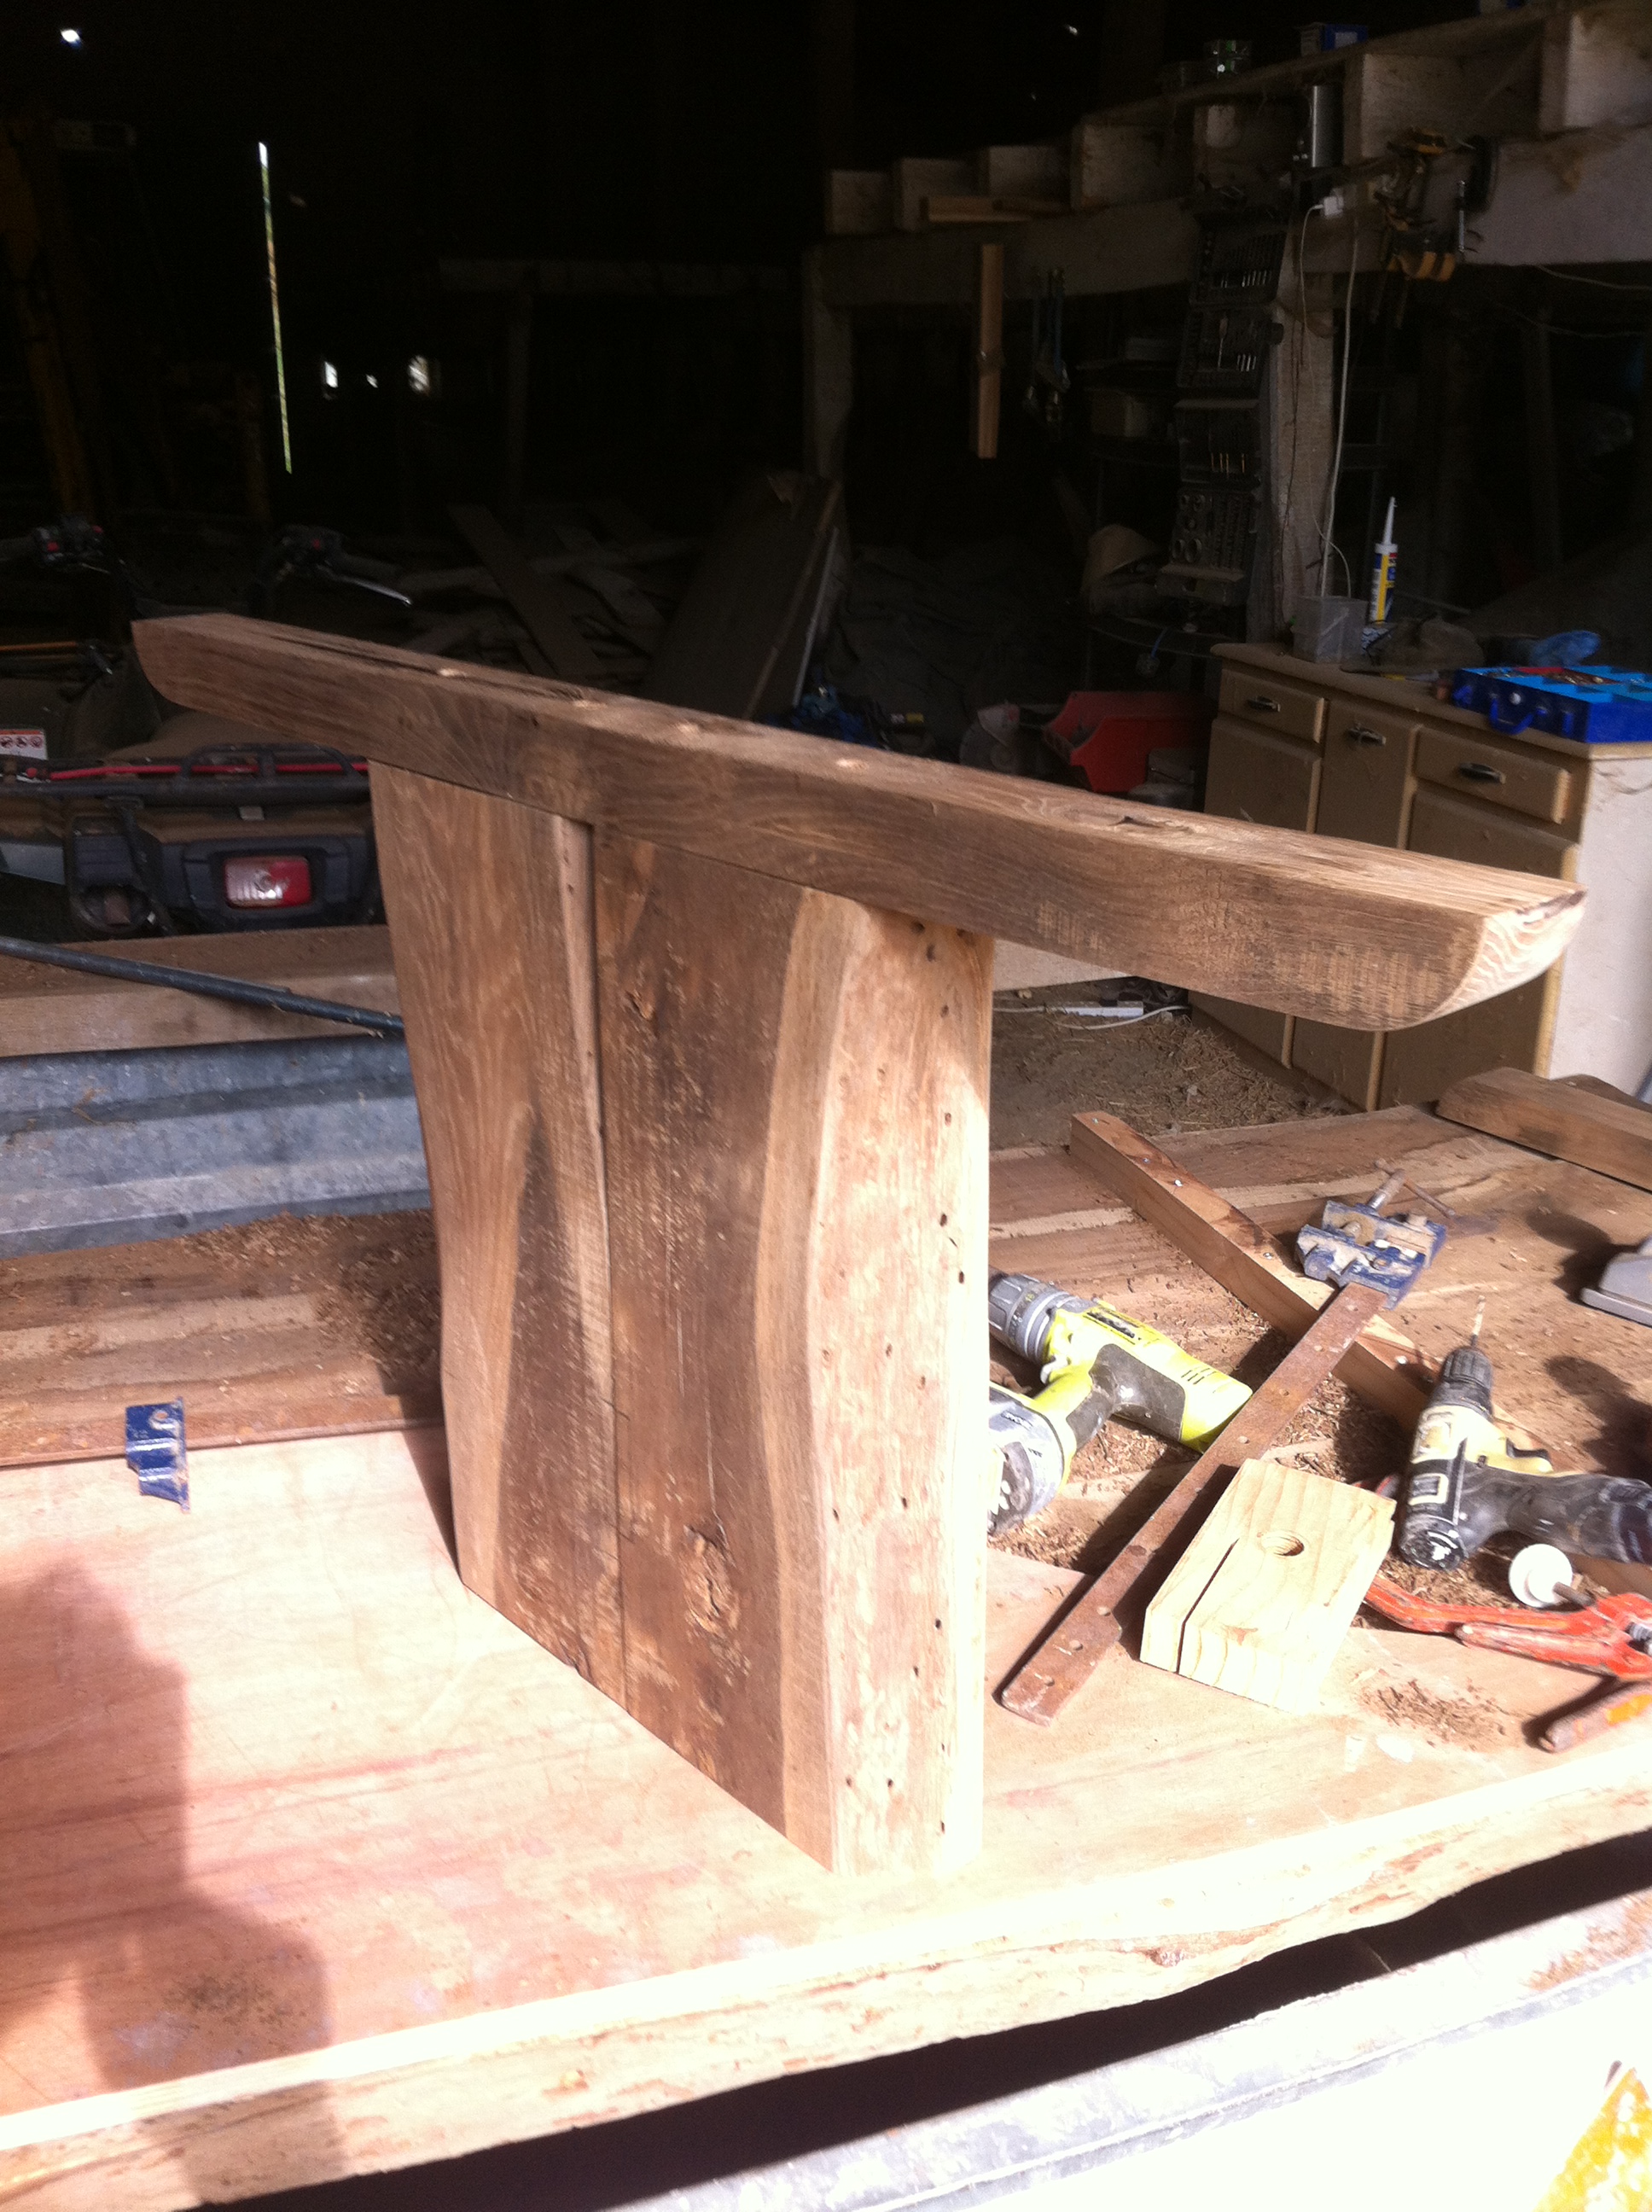
not too worried about things not meeting where the natural flow doesn’t allow, looks more (obviously) natural

mortise out for lower side too side brace
clamped while screwed to upper brace (upside down at mo) which then holds them together at top side


lower brace planed up ready for tenon


inserted and pegged, in being the peg it is also screwed either side, this holds the two pieces together until lower foot goes on

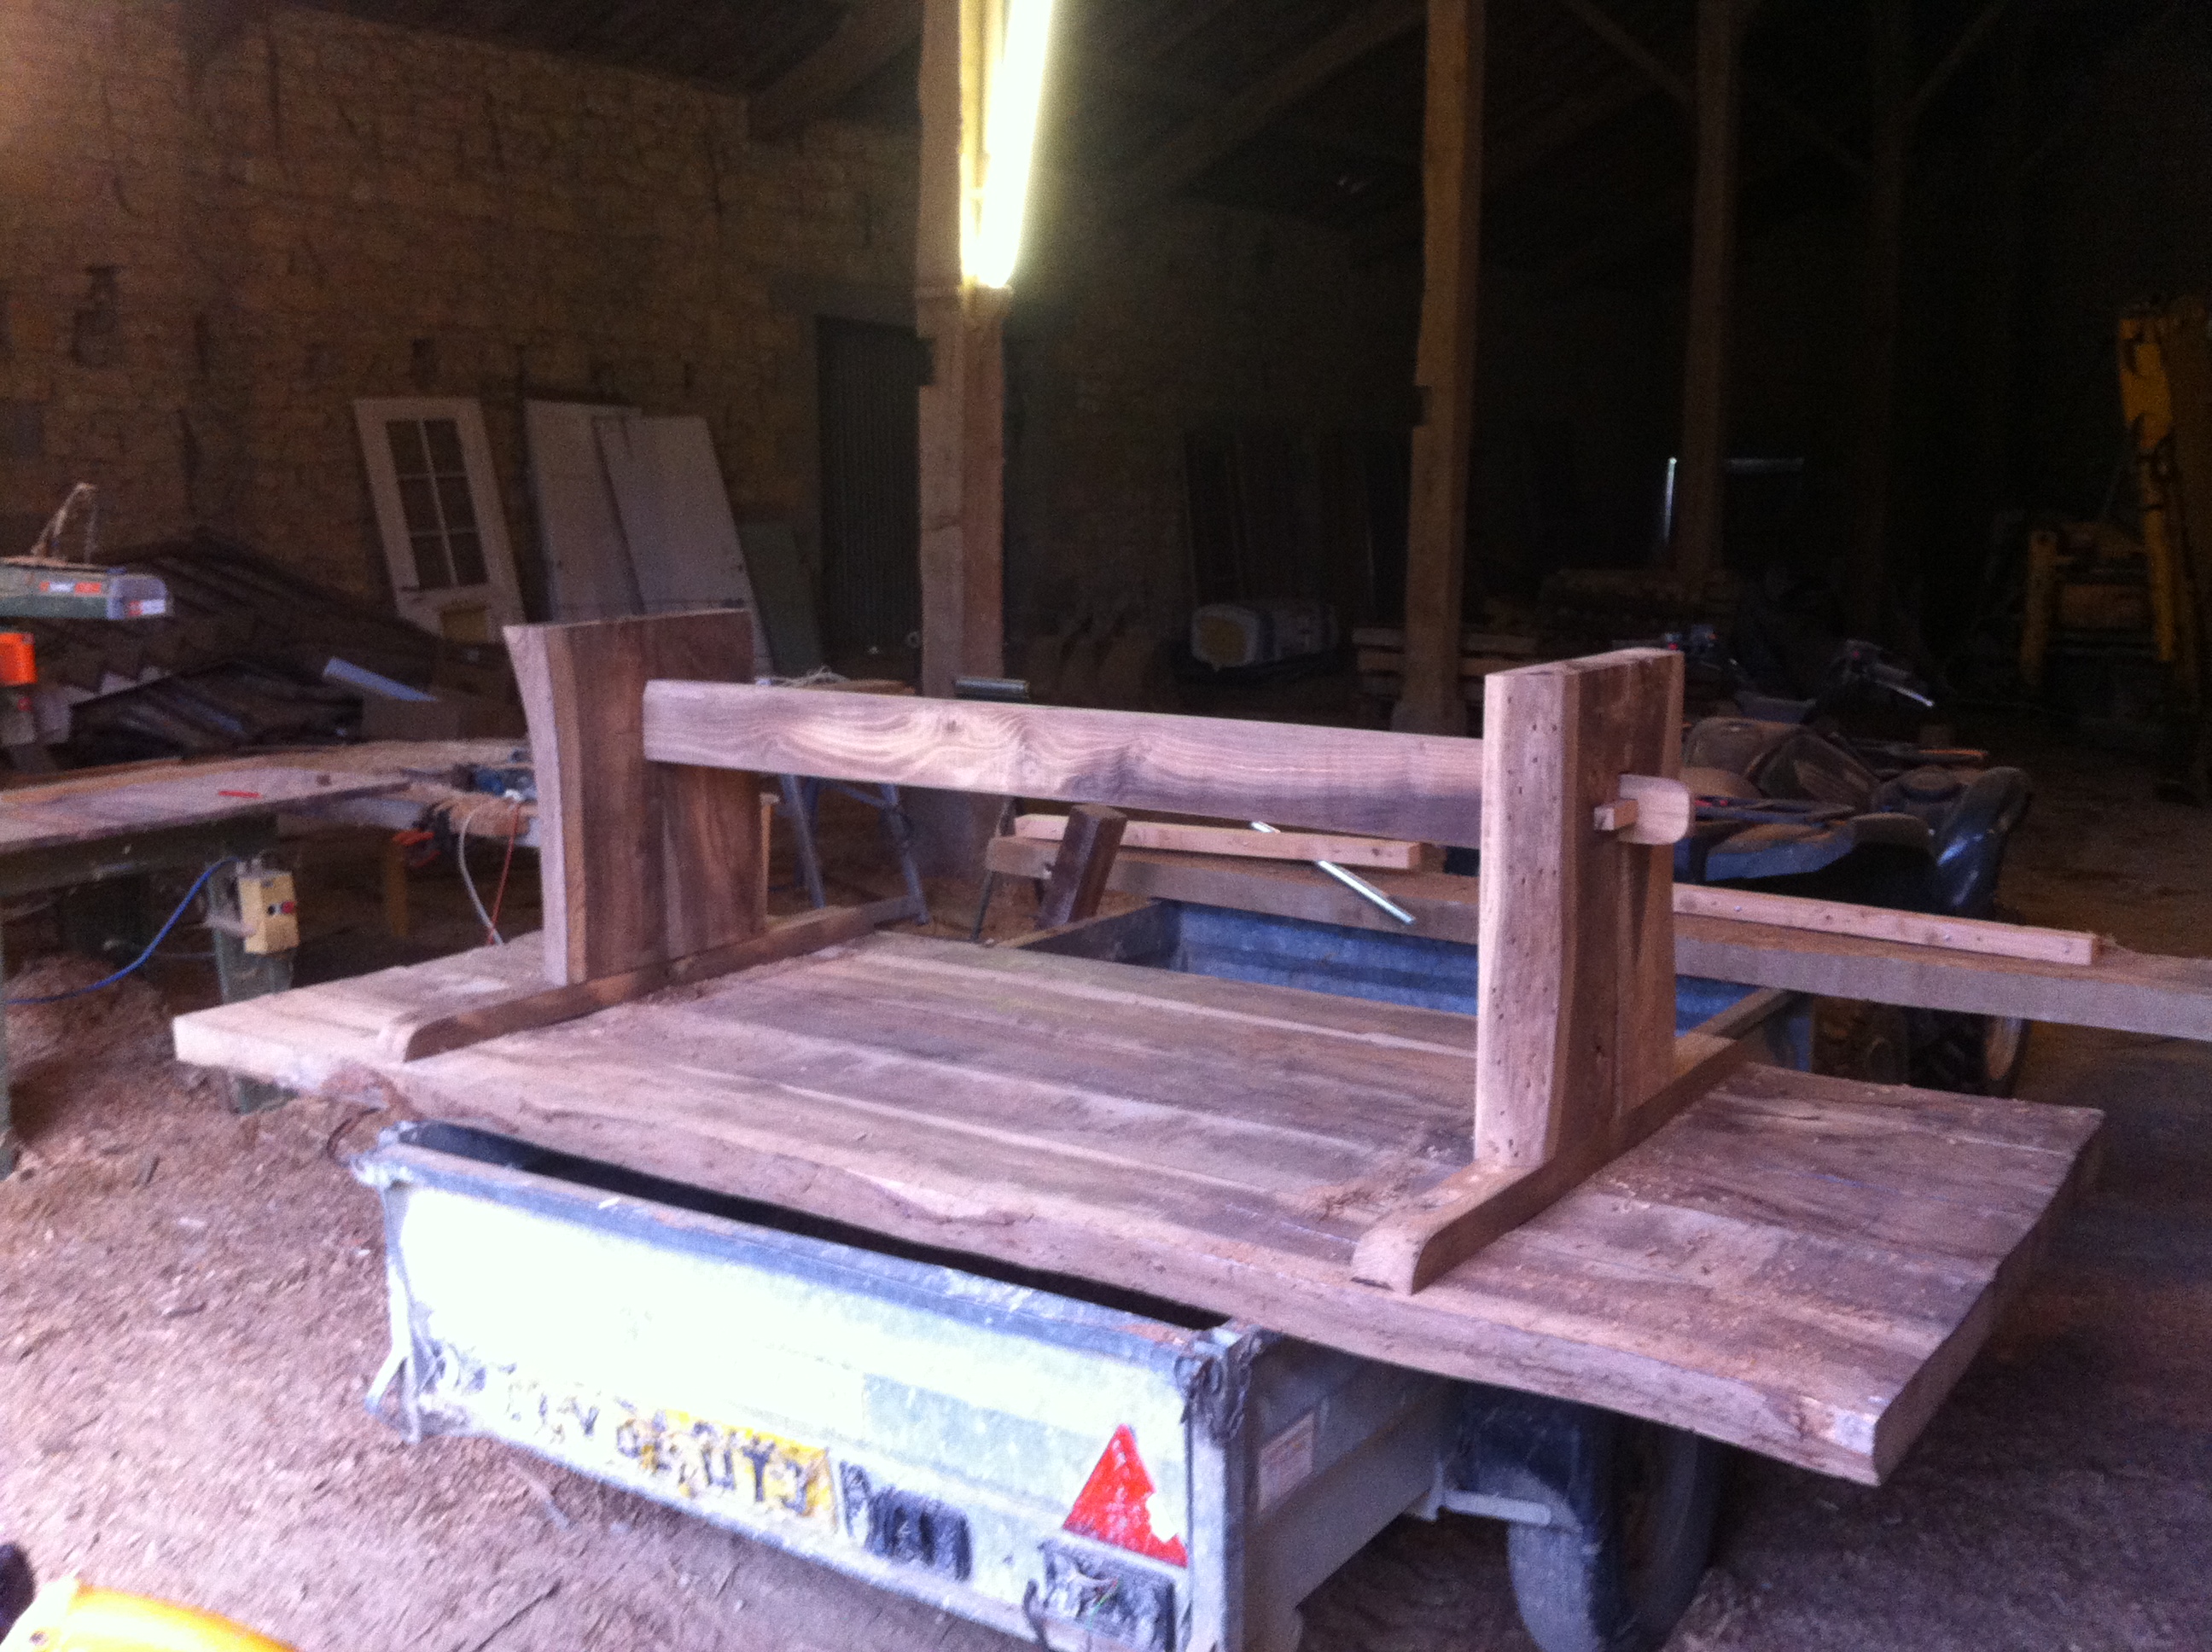
then lower foot can go on, ends need to be rounded yet

I’m going for large feet in addition to this to balance out the weight and aesthetics, again both need to be rounded as yet

et voila, each piece being slightly larger then the one above to give more stature when turned over

bit of grain plugging the screw holes

at this point I need to try and turn it over whilst it stays in the trailer, we’re talking 170kg table by now, spinning it round and letting the legs drop into the trailers length is the way to go but the pulling force of the table as it starts to tip over as far greater than my 100kg and as usual I never have anyone around, so have to push it up to the tipping point (can just about push it up) and hold at the tipping point while moving round the trailer to accept it coming back down again, a nerve racking moment, if it falls it’ll most likely snap the feet off or go through the old trailer floor! gingerly does & success!

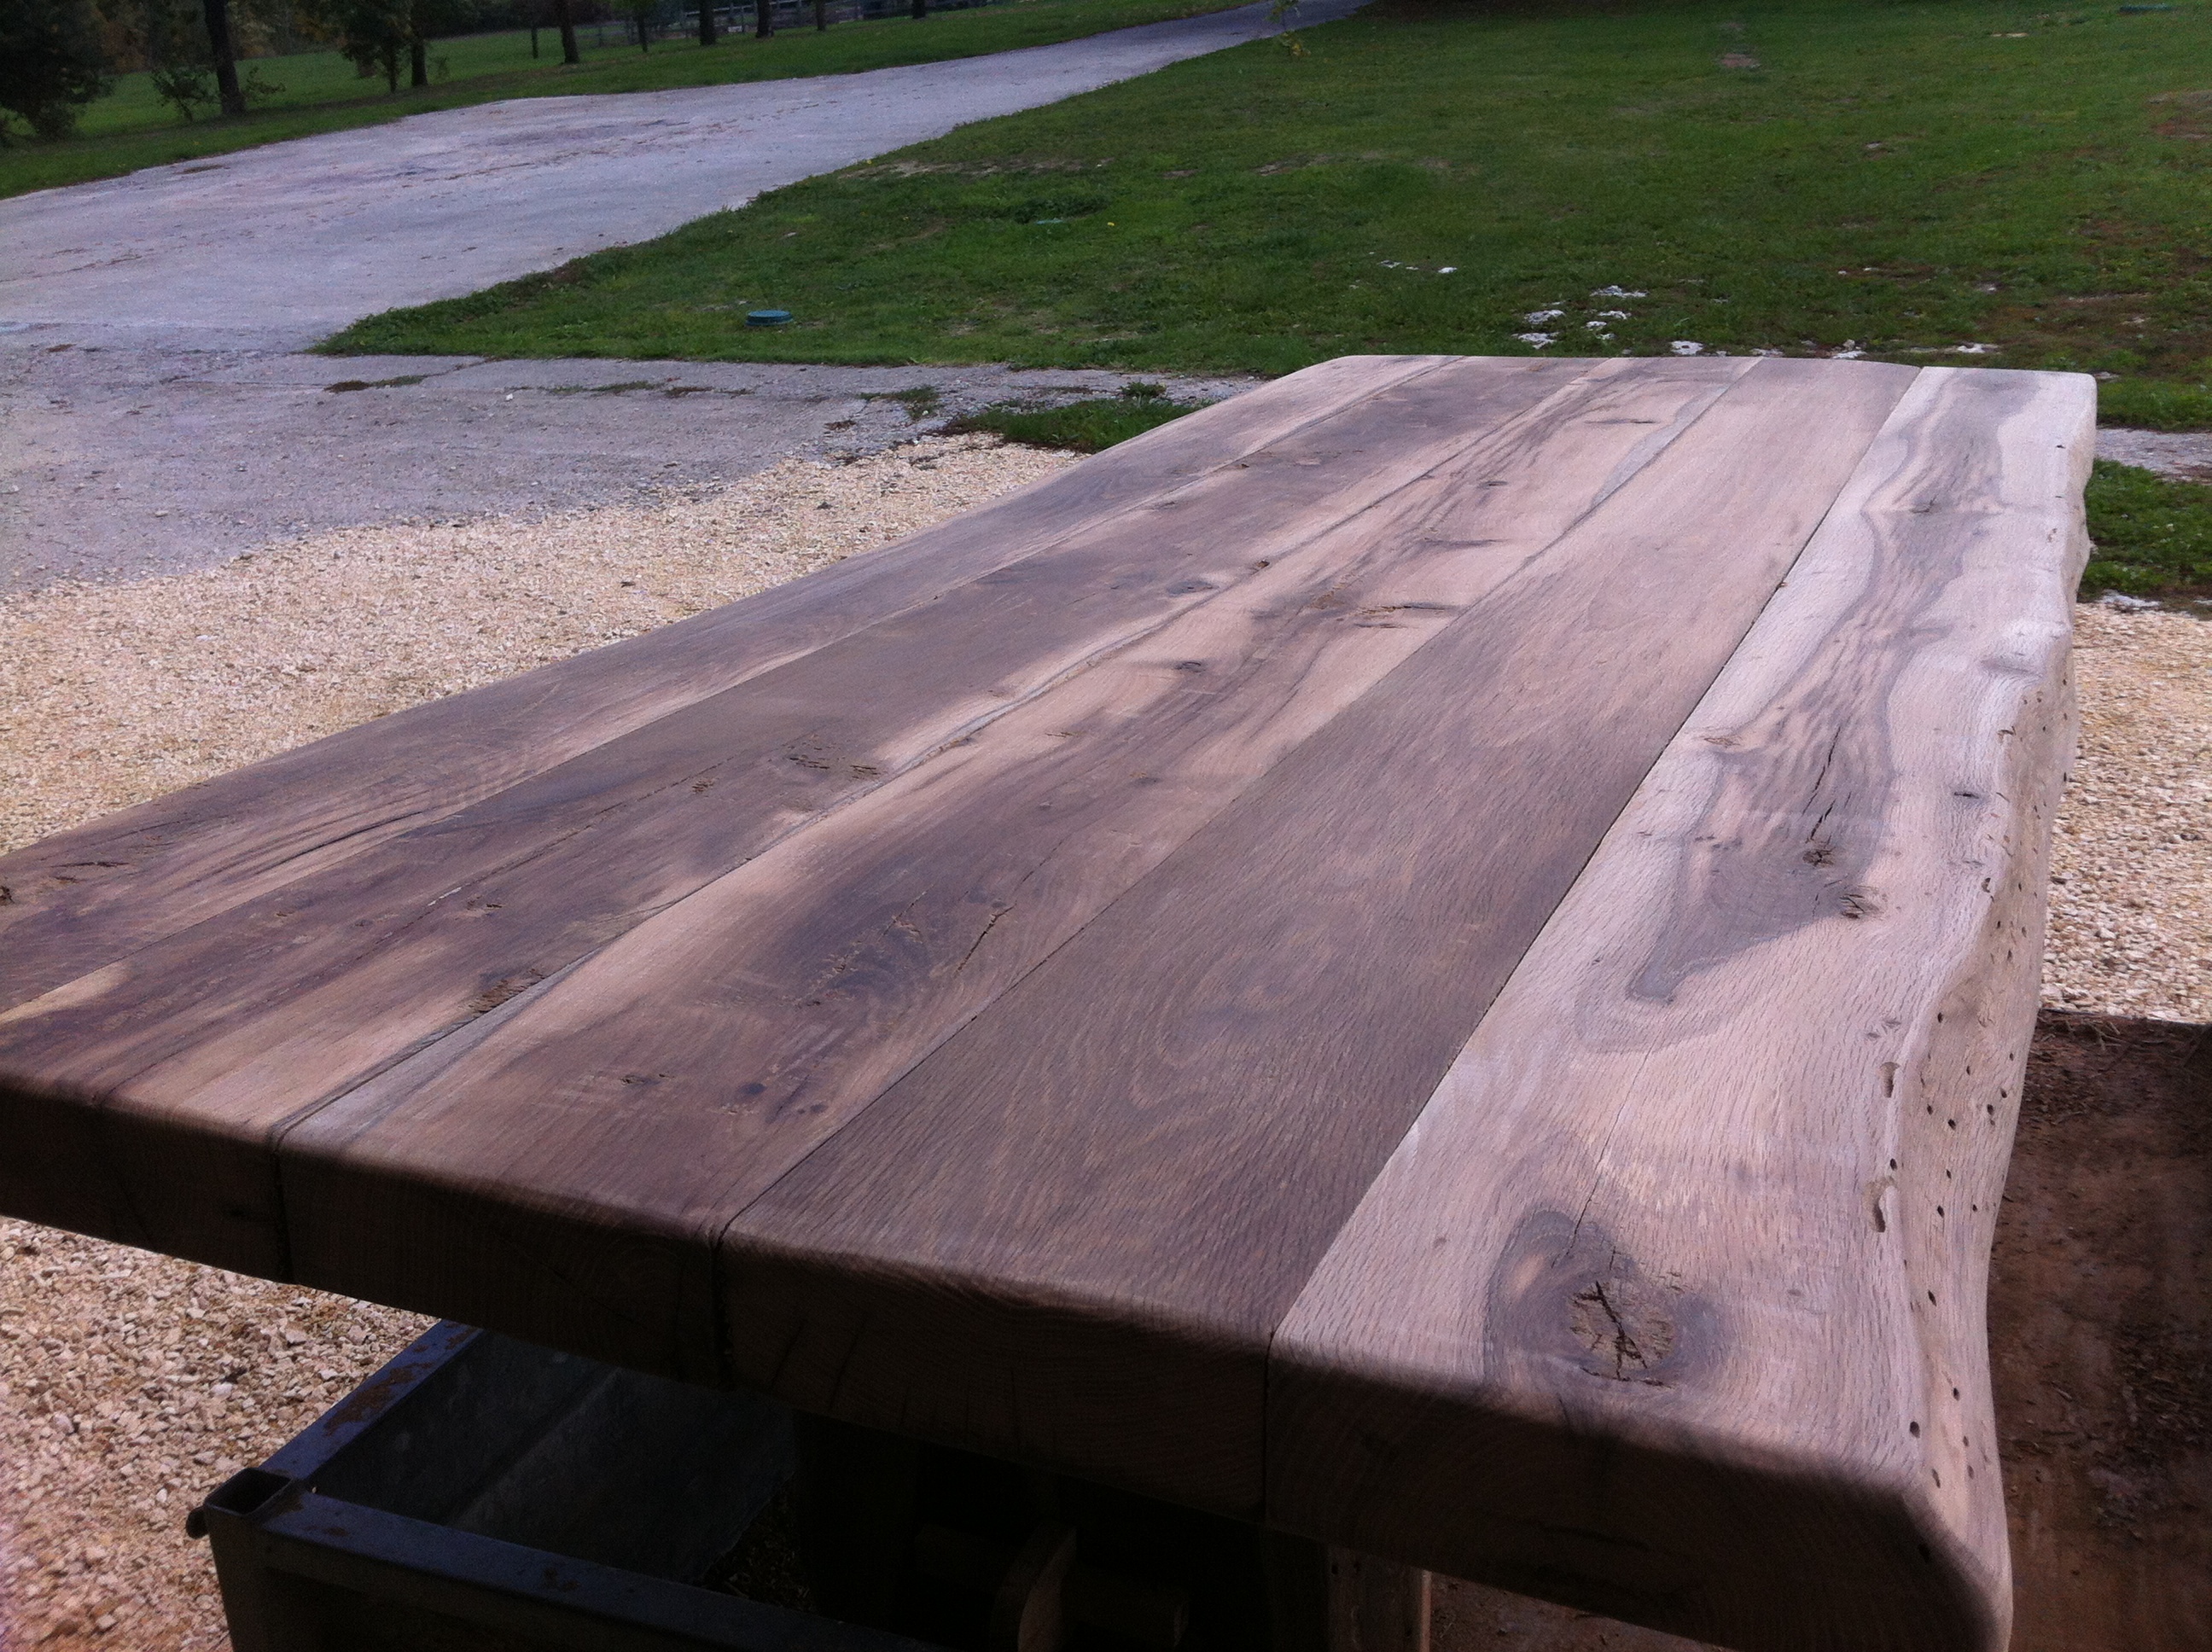
lovely sunny day outside so back up the trailer and plane and sand away for a couple of days! very time intensive but probably the most enjoyable bit, thinking of all the meals and gathering your new surface will see in the years to come…

the results are lovely, so much character and shape, Gill loves anything tactile so putting time into this step is really important, nice knowing it’ll be mutual appreciated

bit of slate inserted in the top for hot stuff

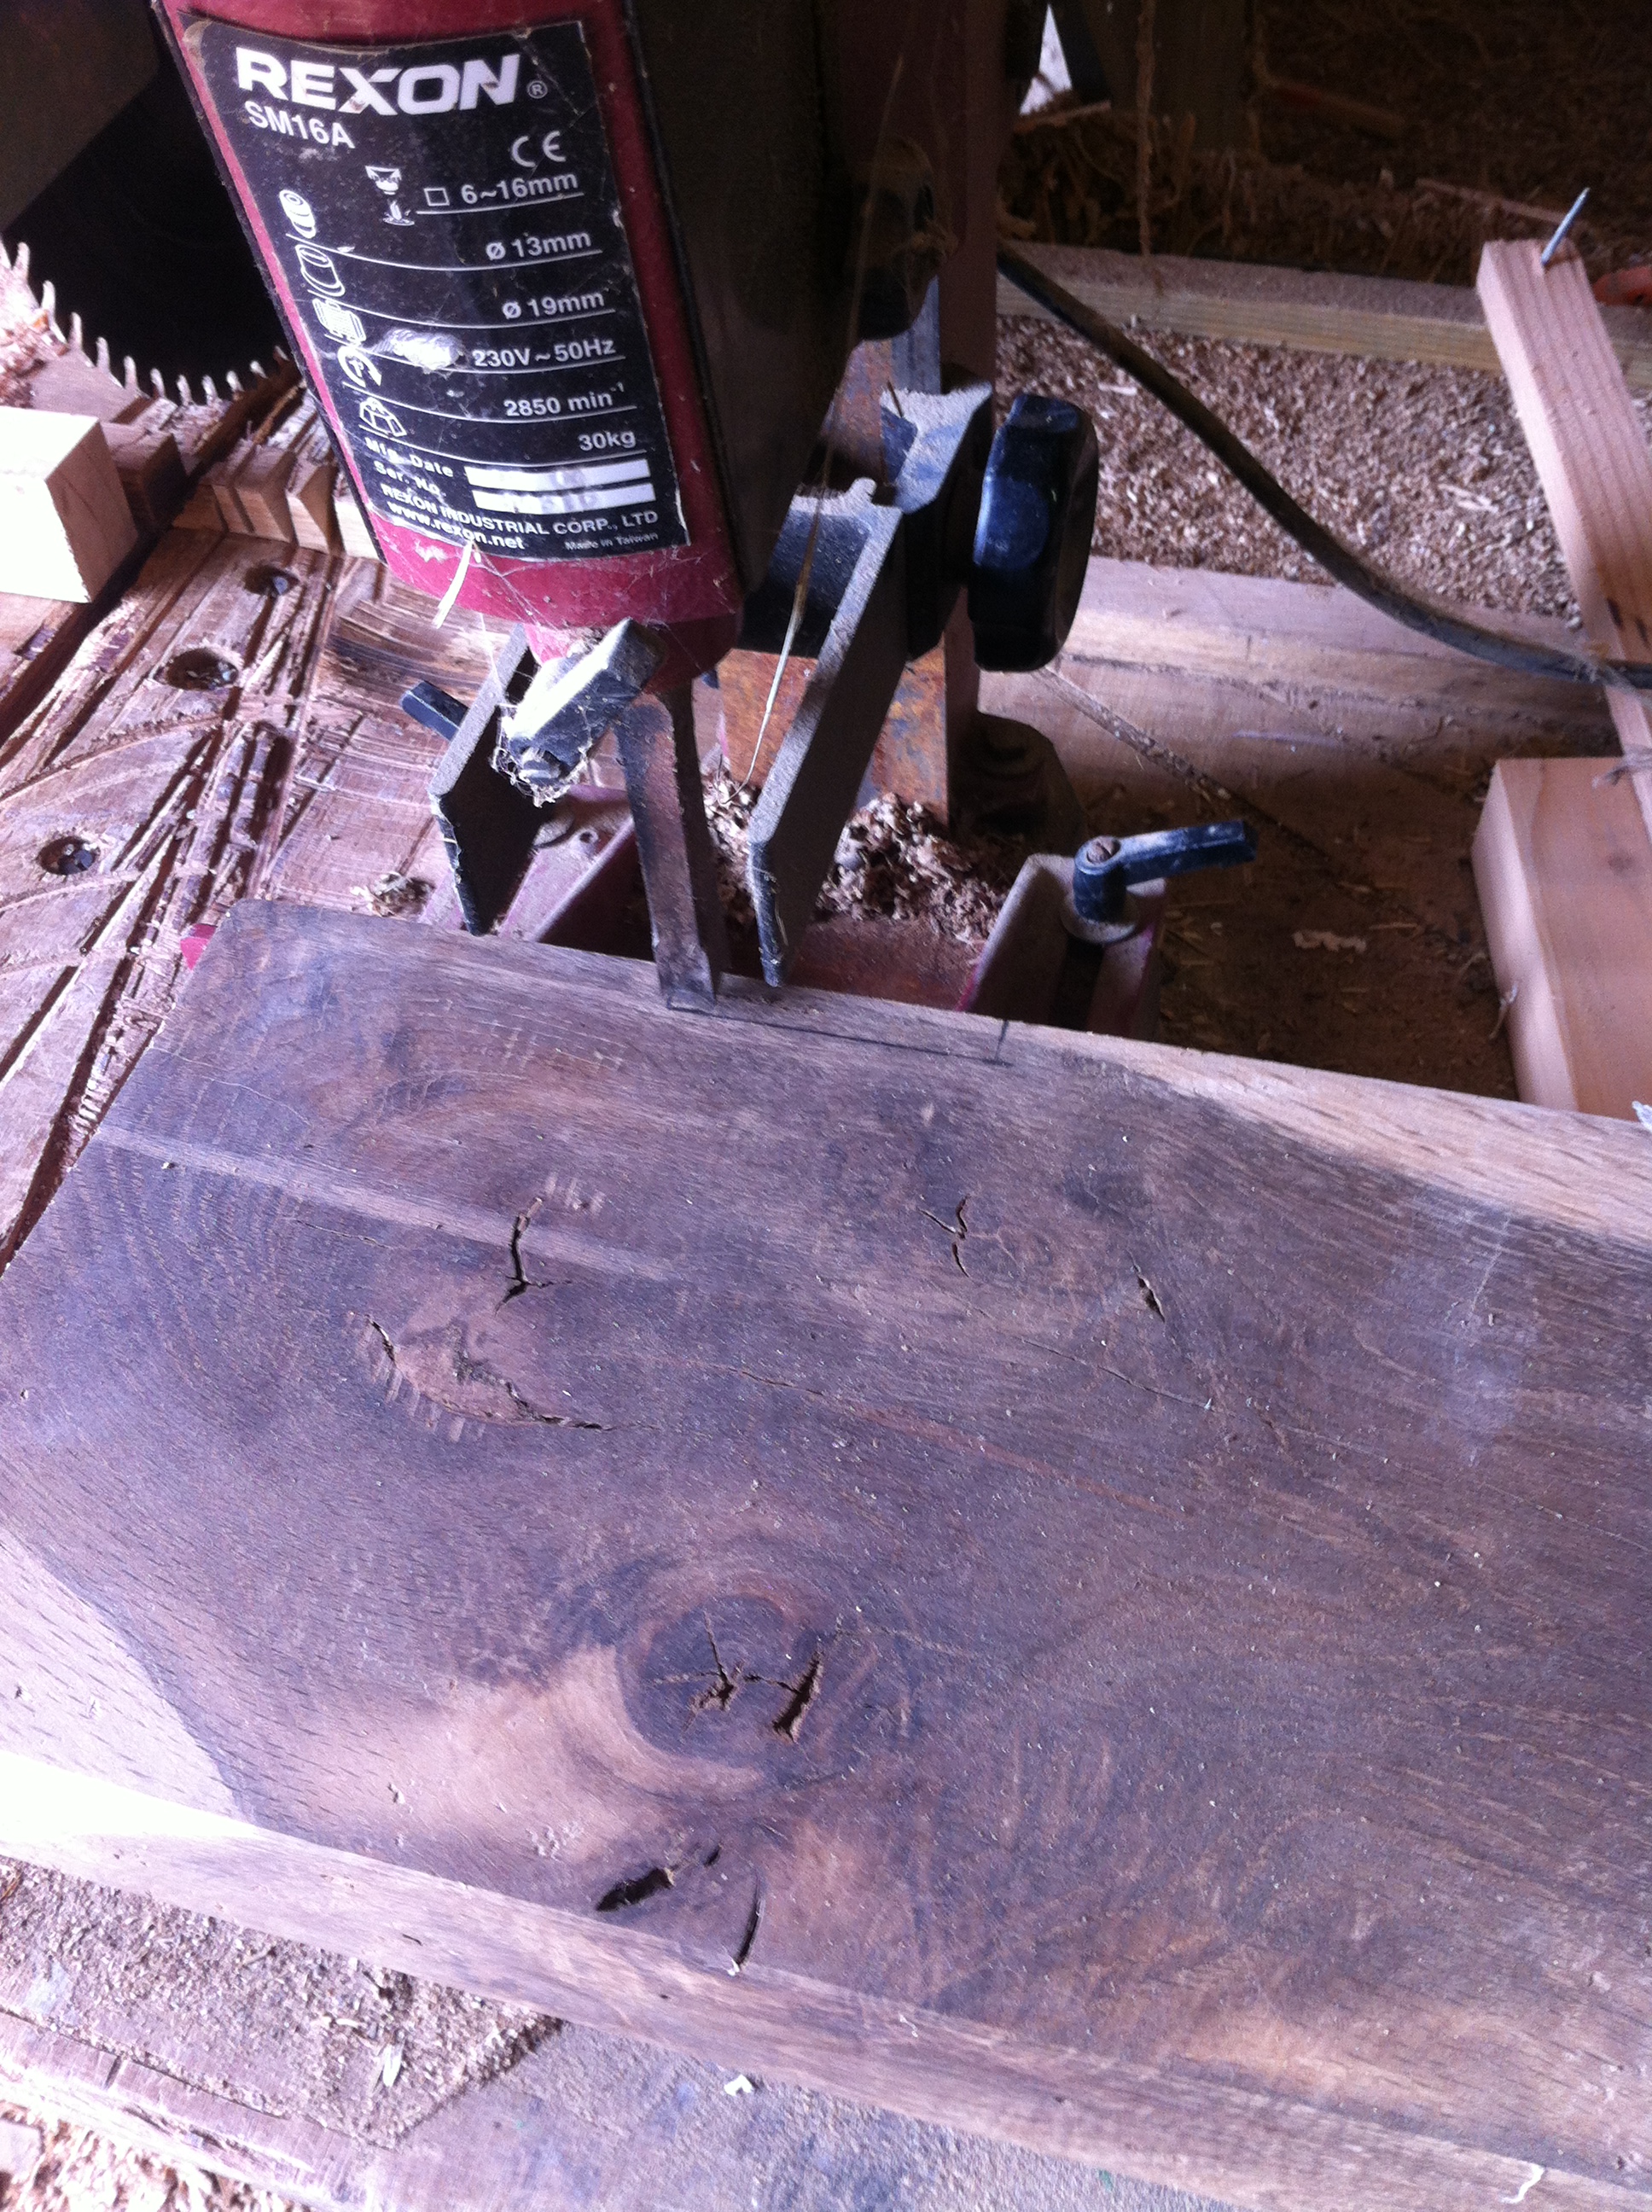
rebate out the centre plank, screws were left accessible earlier for this part underneath so i could just remove from table to do run through saw
then a bit of treatment to protect things, ultra matt finish worktop oil doesn’t change the colour to much or detract from the oaks sheen, slate cut and inserted
cheated and had to use the JCB to get it into position, end to end walked it on ply sheet the rest of the way!


wrapped and ready for reaction, should look good in our barn against all the beams when the barn’s finished, here it sits in our studio for the winter as its too big for any of our cottages 😀

This was definitely one of those moments in my life that I’ll remember forever, i feel so fortunate to be able to do this as there are so many factors in this life that lead to this point and that need to be in place for this to even happen, this moment will only ever happen once, there will be other moments but this one will never happen again….
(apologies for any nausea caused by my comments :))

Pingback: Your DIY! Reclaimed wood table by Nicolas