Yellow Brick Road… March 2016

Need to clean things up a little over by gym and create a more pleasing picture for Ma Chaleur guests, part of this is to cordon off the far side of barn containing gym, this closes things off and makes it feel more private and garden like, here it is unblocked

IMG_1008

Add some fence panels across main part

IMG_1009

and use cladding to take things up to roof on barn

DCIM100MEDIADJI_0002.JPG

DCIM100MEDIADJI_0002.JPG

Pathway needed to gym

IMG_1040

weed kill marked out area and leave for a few days then lay wed mat


IMG_1058

Down with stone and edge with rocks

IMG_1059

DCIM100MEDIADJI_0002.JPG

DCIM100MEDIADJI_0002.JPG


Jan 2016 – Half way…

image Sunrise at Ma Chaleur is a beautifull thing no matter how many times you see it..

July 2015 was the last Post re the project when we just managed to get a temporary apartment finished for us to live in whilst we welcomed the sesasons guests.

6 months later and another sucesfull season completed with some well needed rest to boot we are ready to move onto finishing phase 3, we are in fact past the half way point now and it feels good to be on the down hill section as this should help our joints & bones which are now 5 years older than when we started.

We inted to put the finishing touches to the studio side of our barn (yet to name) before we tackle the main roof of the barn, also the garden area as this gets most use through the sunny days of summer (hopefully)

so, knock up another tub..

turn this pile of Cedar

IMG_2265

getting old hand at this now, should have it down to a tee by now as this is our third install, the best for last? Maybe 🙂 the flteration and heating systems have all been replaced this winter with far superior items which should mean far less maintenance and daily intervention to check levels and temperatures so looking forward to a more hands off afair for next season.

IMG_2267

and put it here, this is how we had it for last year, we stepped straight out of the living room into tub, was quite nice for a temporary measure

IMG_2271

to the right we need to build a wall so in with some footings

IMG_2274

IMG_2278

then build away, quite like doing walls now, just as well really seeing as there are a few to come.

top half will be glazed, panels the other side are just a temporary cover, this wall will house a water feature wall to add to the tranquility of the tub.

I incorporated some supports for the decking beams (old concrete pylons) whilst I was there, the now sit awaiting the joists

the pump, filter and heating system will sit the other side of the wall to make it is quiet as possible.

IMG_2287

said joists going in (not spaced to 400 centres yet)

IMG_2285

need to get an idea of what is happening with the water feature so i can lay joists correctly so on with my thinking cap as we want to keep the water pipe as invisible as possible.

incorporating a copper pipe within the new window cill thats yet to be fitted seems the best option

5 m  I can just about get away with in the estate car, just need to fettle it slightly…

Tia will sleep in here no matter what i load the car with!

IMG_2288

she likes a drive once in a while to

image

first off give it a weather either side, some nice tongues to slide either side of beams, then I can peg them in place for the ‘Barn’ look

IMG_2291

turn over and rebate in a piece of copper pipe

IMG_2292

add some lead flashing for the water to fall down

IMG_2293

right way up, like this

IMG_2294

cill in place with the feed running down the back side of the wall

IMG_2295

round the other side (tub side) i’ll tuck the tiles up underneath lead flashing and trim the lead, copper pipe will be drilled progressively  to produce just the right amount of water so as not to be too noisy, you can just about see it above the flashing

IMG_2296

pretty discreet so far

IMG_2297

some more lead flashing for the water to run over and into catch pond

IMG_0005

time for some tiling

IMG_0003

bit of sealer on wall for adhesive to bond to

IMG_0006

et voila

IMG_0007

lead trimmed and pipe just visible enough to be able to drill when the time is right

IMG_0008

IMG_0009

masked up for rendering

IMG_2305

rendered

IMG_2306

one catch pond made

IMG_2307

and attached

IMG_2311

then lined with rubber pond liner with overflow pipe installed that’ll feed the ‘Rills’ that’ll run through the lower decking area

IMG_2315


IMG_2316

now i can start covering it all up with some decking…

round the tub first

image

cut out to front is where the water will drop into the Rill channel at the start of its journey..

image

starting to come together, the 3 rectangular sections to the bottom of photo will separate the bedroom and lounging area of the decking, the latter will be where the fire pit and sofas will go, some lighting and planting will go in these three areas but there will be two walk ways for access.

image

will be a lovely way to wake in the morning, everything is operated wirelessly inc. music. with doors left open of a summer eve, waking to  the water, music and lighting coming on 15 mins after sunrise should be sublime..

image


In the dog house… March 2015

DSC00546

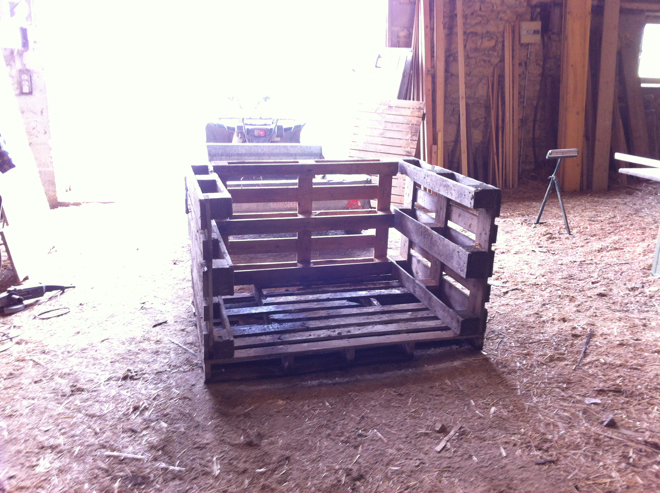
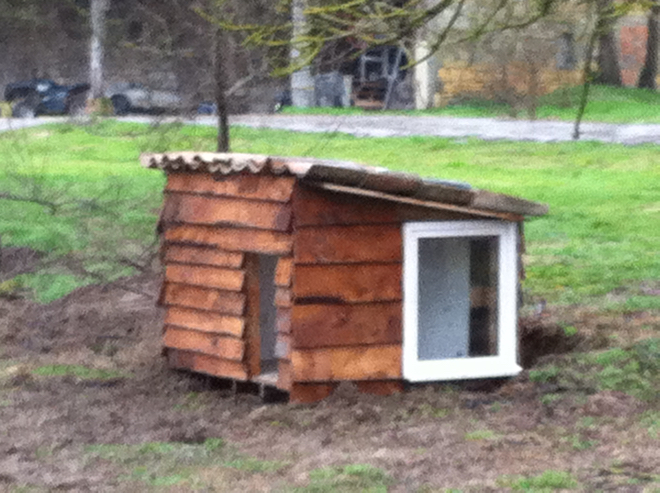
all this building houses for everyone & realised Tia doesn’t have one, so a Sunday moment took me to the workshop to build her one…

old pallets are cheap, strong and a plenty here 🙂

IMG_1940


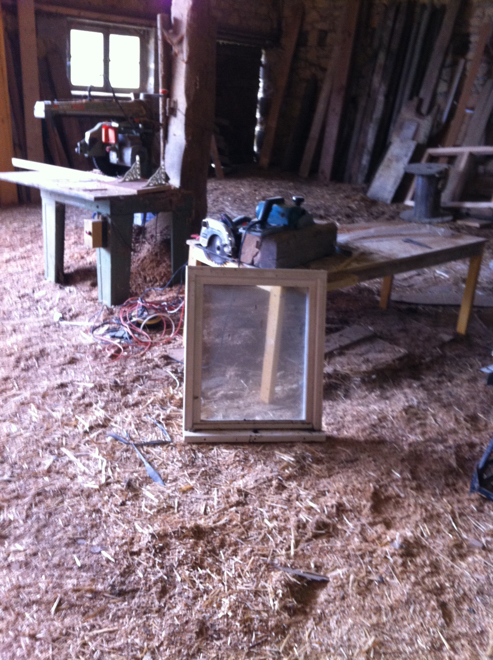
had a window left over from an earlier project so cut that in for her whilst there, double glazed no less!

IMG_1939


boarded the top


IMG_1941


IMG_1942

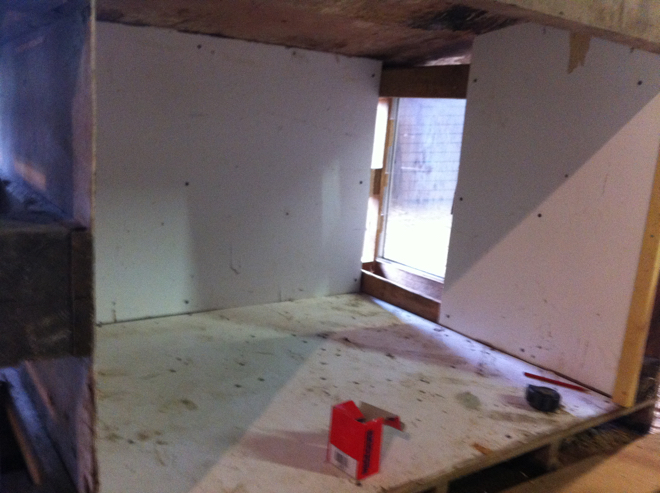
boarded inside with some left over ply

IMG_1943


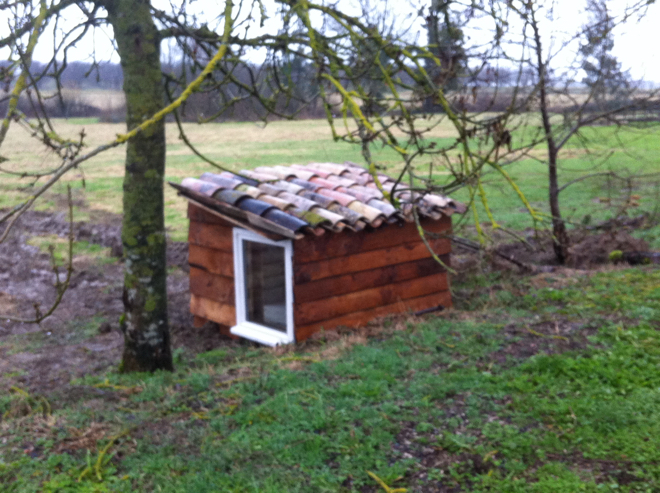
clad in oak!! on a pallet means i can move it around with the fork lift, easy for Tia to move house then!

IMG_1945

IMG_1944


Beaming Oct 2013

_MG_7050_2

Sun’s out so I feel compelled to do some more roofing, it seems to be in my blood now..

just an ickle roof on the ‘to be’ luxury bathroom, hard to believe seeing this, all tiles off

knocked down some walls to open it up a bit

having taken down the dividing wall which was supporting this central beam slightly, we’ll need  to install a BIG beam instead, there’s one i’ve been eyeing up for a while over in the gym, the one pictured here is far to spindly to be exposed and look any good, never mind being insufficient, the replacement should look far more appropriate

this is it, pretty much doing nothing but looking pretty

I know its the gym & I really should have practiced my clean & jerk with it but I was tired so enlisted on Big Birtha (JCB)

jet washed, turns out the longer of the two & the one I shall be using, is in fact Beech (very light) but still very attractive grain to look at whilst lying in bath smile

already has a great arc to it after years of supporting itself & not much else that i could see, its got some cut outs and mortices that need attention so give it a couple of days in the sun and I’ll tackle them

et voila! worked area should dull back down given time to match the rest of the beam

back at bathroom & readying things to take the beam

as it turned out it was easier to remove EVERYTHING, it needed all planing back to natural timber anyway, much easier at ground level, supports will be cut off and header will be planed back and sit atop new posts/uprights that go all the way to the floor

ply removed reveals old metal window, this comes out and will be replaced with a timber frame that’ll be clad on the outside with err ‘cladding’ smile

onto the new uprights & a need to recess them into existing wall, they’ll sit on top of a limestone pad, stops rot & termites, so cutting out wall…

not gone all the way to the bottom as this is the height the stone will sit at, post will sit half on wall half on stone

recon on the farm to find things is always good fun, Tia likes to help, she found some great stone smile cutting them is very similar to working with wood, quite like masonary work, even if it does leave you looking like a ghost! well, its Halloween smile

a shelf on wall needs removing to make things flush for render

foot stones in place, decking should come about halfway up

centre beam in place & one of the new uprights sat on stone, it looks like its sat on top of upright, its not, just an illusion…

this gives better perspective front header in place now and offered up one of the rafters to get centre beam height right

all rafters in place, I’ve cut them back to only have 1″ overhang as I want to see header etc when guttering is installed

there was enough length on upright to allow me leave have a lip for header to sit behind, I shall the drill through front too back and use an oak peg for an authentic look.

pleased with how its transforming so far, should actually be something interesting to look at when sat on decking

onto roof, boarded overhangs, under felt will go over the top of this but under the battens as these will be seen from underneath outside

air bricks to fill in recess on wall ready for render

concrete blocks for building up and filling doorway

et voila!

cement panels added to roof, we’ll then stick old roman tiles (of which we have more than a fair share) on top but not in the valleys, looks really authentic but fully sealed with no movement underneath, looks nicer than the mechanical tiles even like this, there is a window (obviously) to left and you might be able to see the padstone for the third centre support post, this’ll also have 45º supports branching off to meet header.

clad the ends

original ‘hand made’ canal / roman tiles added to cover cement boards

added some decorative supports to the beams and the window.

this is it for now, vast improvement

photo_2-2

wall lights up, should look nice at night..photo_4

photo_4

Follow the yellow brick road.. March 2013

_MG_6128

new road marked out to the two Gites , we have distributed all the rubble created from pulling down the oven but it hasn’t gone as far as we thought it would so the quarries are contacted for some 40-50 stone.

its got a nice flow as it passes the plum trees along the way smile
 

the road passes the hot tub so to create some privacy as you hunker down in the tub we now have a fence

a 6 ton truck delivery goes nowhere, a fair few of these will be needed

i have started from the other end as well so as to egg me on whichever end I might be

at the other end i got involved in giving Mon Coeur her name plaque to comemerate the new Chemin / road

went a bit like this..

right at the start of this renovation we had to cut down a big acacia tree, being a very straight species we kept it in the hope we could use it for something further down the line

a solar light for the top

another old branch from somewhere else with a nice shape that leant itself to hanging a sign

joined together

planed up a bit of oak, chiseled in the name and filled in with black paint (both sides) then lacquered

all in place in front of the new Chemin, a great feeling

9161062782_9ae7381c63_c

Reasons to be cheerful.. Sept 2012

IMG_1073

house is moving ahead at a good rate but this story is as much about our journey as the renovation itself, Its quite easy for me to get absorbed by the build because I enjoy it with such a passion, sometimes though I realise how blinkered I’ve been to what’s going on around me, not normally very long, a couple of weeks or so, but when I do open my eyes a little wider I like to capture the days that follow, here’s a few pics of the things that have grounded me the last couple of days…

the Macro photo flower bed that Gill planted specifically for me & that I’ve not taken any pics in yet paperbag

late eve so a little lacking in critters, but managed a few, a favourite of mine & a few more around this year since it was wetter early on

morning glory on our grape vine trellis as we were to late for planting of the grapes, this is a weed apparently!

our butternut squash, yum!

melons, love melons smile

in the 30s most days now, Tias been getting a little hot, set up a shower for her in the garden (for all of us really) but now the farmer is using sprinklers on our prune trees, she loves it!


Harvest. Sept 2012

_MG_4756

the Potagers latest results, Gill cooked these up in garlic last night (our garlic isn’t ready yet, so shop bought) 

haven’t tasted peas & beans like it since ‘la manoir’, incredible taste lick serve these up to kids and they’d be all over them.

turnip results already eek due I guess to the wetter than usual climes, it seems conditions are perfect for the potager at the mo, the greenery is being far more persistent this year.

looking very healthy down there

had our fields cut and rolled to

carrots are a little less impressive, as a guy, I felt a little sorry for them but Gill was impatient to see what they looked like, she’s happy that they are straight hehe

Purple jalepenos

Rock ‘n’ Roll.. March 2012

8283154599_77723efa66_o

we’d piled up earth at the end of the garden for Mon Coeur but needed some BIG rocks as features set into the bank of earth.

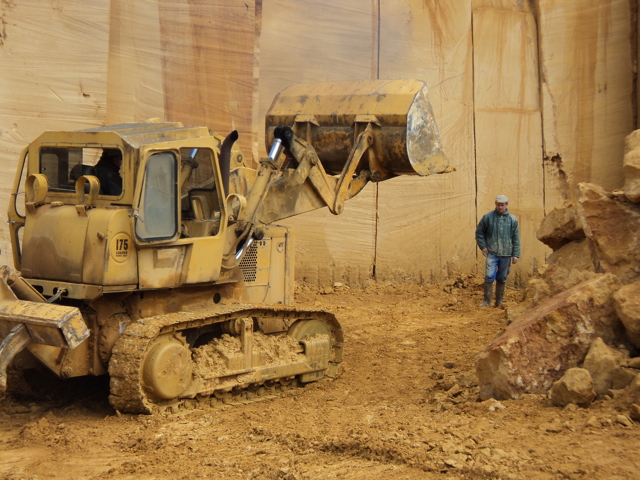
We found an old quarry near by wich seems to be from a forgotten era.

Two guys, 1 x Dozer, 1 x Chainsaw I’ve never seen the likes of and a shed where they make fireplaces etc from said stone, an amazing place and a very helpful couple of guys.

THAT’S a chainsaw!

these are sandstone and are pretty much thrown away as they have defects in them, that means fireplaces and such like cannot be honed from them, the limestone we picked up from a different quarry & were more money but still cheap, we wanted a mix of the red sandstone and white limestone (no pics of lime)

bit more landscaping along with the rocks, we dug some channels between the fruit trees we planted late last year (they’re fruiting nicely) .

These channels/borders will carry small bushes along with the fruit trees to create a boundary, seems a sin creating a garden within a big field but it makes sense when you see it, couple of the sandstone rocks to rear

believe it or not, the rocks & banked soil to the rear are 5ft tall, they look like pebels in the photo rolleyes


little house has become handy for many things, its now a nursery to, through rafters from upstairs, these are for the top of bank and between trees in borders

This time last year was a bit of a haze as we were trying to get Ma Chaleur round for living in, we sort of missed the bloom of our mature trees, this year is different, hard to capture their true beauty but they are incredible in the flesh, maybe a little more healthy than last year because Gill cut down some very established vines last year, plus they’ve had far more water than last year.

We had some very weird light with a thunderstorm the other week, it looked incredible, I had a go with HDR to see if I could replicate, it fails but gives an idea on how extreme the two lights were.

Feeling a bit Tubby Feb 2012

DSC00468

really been looking forward to this one, its wood, it’s creative & it smells nice, what more could you ask for hehe

building the Hot Tub for the little house, keeping it cool to start with, it’ll be nice to have somewhere to cool off over the coming months cloud9

going to turn this pile of Cedar in the back of the car

for me there’s something poetic about the way a router can machine a two natural pieces of timber to connect in a mechanical fashion.

A first & a bit experimental so I’ve not invested in the specific router bits needed, instead I’ll make two passes to create the 1/2 round joint I need, if successful then i’ll buy some shiny bits for the next one, not even got a proper router table!

these are the upright staves

and this is the joint created on each one with the router

then onto creating the platform, they’ll be 2 tons of water in here so something pretty substantial is needed, 30mm thick boards tongued & grooved, again with the router, different bits though, very happy to find my old jointing bits that I used only once before, costa a small fortune for the matching pair, the 8 blade tongue cutter is an evil thing when spinning at 18k rpm with finger tips very close when cutting 4″ boards.

beautiful fit

all joined together

chunks of hardwood as braces

then the runners

turned over and cut round

then the staves we created earlier need to be rebated so that the floor can slot into them, a cross cut saw can be used for this but I find the router far more consistent and less disruptive of the wood, more time to set up though.

next is to mount them to the floor, but first off, I need to find some stainless or zinc banding from somewhere, i have an idea on how to fabricate a joint to tighten the bands, just need the bands scratchchin 

roll on a couple of weeks…

found some bands in UK & got then sent, cheaper than france (surprise surprise)

so find an appropriate location for assembly, it’ll be quite heavy so find somewhere close to its final location, we left a couple of tree stumps proud earlier in the project as i thought they’d come in handy  biggrin so screwed a support to one of them

balance base

slot all the staves on

use a ratchet strap to keep them tight while i make up one of the bands

onto fabricating some way of joining the two ends and at the same time creating a way of tightening / adjusting.

cut out some plates from an old bit of box section

its in my head, we’ll see how well my hands can convert that

selection of bolts, bar, washers & nuts, i was more a Lego guy than Mecano but still liked the latter

found these barrel hinges on the shelf in the local hardware store which looked like the female side could be butchered to work

intention is to create something like this with a threaded bar running through the barrels (I’m taking tips from a manual I found on line if anyone wants it)

cut off the sealed ends of the barrels and reem out to M10, could have used tube but wanted something with thicker walls as I’d rather over engineer something like this

bolted on with spring washers & dome nuts, they actualy look quite ornamental, or have I just been living rural life for to long hehe

and in place