Blurr! July 2015

IMG_2207 (1)


Well we made it! but only just & it was all such a blur, 6 week stretch & each being a 70 hour week, before which I was informed by the doc that I was suffering Chronic fatigue and that I needed to back off 😦 if only!

I trusted in my years of health & fitness training to get me through and physical it did, my emotional state and nerves on the other hand are going to take same time to heal I think, I need to bond with the place again and realise what beauty it holds and how much therapy it offers to all that experience it, i guess its my time to be healed by the place….

I didn’t get many photos i’m afraid of the glass units I put in above the doors, the joint and taping of plasterboards, painting and decorating, tiling bathroom floor or under floor heating.

Last images I got were of the plasterboard going up, fosse going in and the landscaping thereafter and some of the HW tank and plumbing, so here they are for now.

concrete floor going down for the tank area, drainage for overflow on tank and future bathroom to, all the pipes come through an old window from studio section of barn ready to connect up.

insulation and damp proof


IMG_2175


concrete made and poured


IMG_2176


tank in along with custom 3 phase timer and manifold for future requirements

IMG_2199


IMG_2205

IMG_2200

fosse being dug in

IMG_2182


and then hit bed rock 😦  so have to drill loads of 25mm holes at different intervals so JCB can penetrate and its 38º I had no idea how I was going to get past this feeling the way I did if I’m honest


IMG_2183


I got as low as I could but I had to raise the earth round the fosse at the end as there was no way of going deeper without a breaker on the JCB and we had NO time so levelled off with sand

IMG_2187


scarfed in to the system for Ma Chaleur


IMG_2177


and then run back toward new fosse, kept turf fresh as i went to help make a quick recovery for the scarred grass

IMG_2178


all connected up, pipe running back from front edge is vent pipe

IMG_2195


landscaped, seeded and watering, decorative stone will sit on top of the fosse as grass is a pain to maintain

IMG_2201


boarding ceiling and more insulation as i go, much easier to put up there at the same time

IMG_2153


IMG_2159


air extraction unit in distance all plumbed in as well

IMG_2156

AC unit in at same time as boarding, along with LightWave relays for remote operation so we can turn on heater or AC when out and about

IMG_2165


more boarding and Lightwave relays for the underfloor heating, also thermostat for floor heating (going electric due to Tesla Batteries)

IMG_2158

the board bending worked well and the joint & taping blended great to leave it looking purposeful

IMG_2160


main bedroom, temp. kitch and bathroom all boarded

IMG_2170


no pics from here on in, bathroom is still in progress but operational, we used interlocking gym matting for the main bedroom which was a life saver and LOVELY to walk on, but it is sooo cool, quiet and has fantastic views we don’t mind finishing bits while we’re in.

I honestly didn’t think we would love it as much as we do, we have the option to move into one our two luxury gites when the season ends but right now we’re really not bothered as we’re enjoying it so much, yet to do the outside area but give me 4 weeks and we’ll be there, the sunrise each morning is stunning, as the heat of the day hits we’re completely shaded by the huge terrace roof that hangs over, perfect!


DSC00795


need to get some light fittings up 😀

BED 1


need BIG rest now but unsure I’ll get it, we’ll see…

Room with a view.. Jan 2015

_MG_7126_2

well i was going to use her for my next job, to be fair I use her for most of my jobs 🙂 its my right hand man (girl) but unfortunately the January blues have got to her and she’s had a breakdown 😦

IMG_1788


Its been almost two years since the last breakdown when the UJ on the propshaft to the hydraulic pump snapped destroying an intercooler in the process, so we’ve not done too bad, it gets used pretty often, not hard work but quite regular so i don’t begrudge some effort to put things right.

This time I lost steering, felt like a spline has been on the way out for a while leaving me with sloppy steering, true enough the spline at the lower end of the steering column has rounded off so a bit of a strip down is in order, wheel off (the easy bit)

IMG_1789

next up all the cowling and instruments

IMG_1796

got this great present for christmas, ‘landmine’ torch, each of the prongs is a magnet which gives you loads of different angles for projection when its clinging to something metal

IMG_1798

absolutely perfect for this area i need to shed some light on, the offending Universal Joint at the bottom

IMG_1797

removed, you can see the rounded off section

IMG_1799

now she’s out of action until the new part arrives, JCB parts here are not on every street corner…

So what was to be a challenge ‘with’ the JCB is now going to be a slightly larger challenge without, so back to medieval ways of doing things; block n tackle, winches and levers, it’ll make me think of the guys that built it originally I guess 😀

I’ve got to add some support beams in this opening, mainly for aesthetics but also they’ll provide additional support and reduce the opening to suit the standard size bi-fold doors

firstly I remove the softwood face beam that seems to be doing nothing as far as i can see (hoping) and reveal the oak beam behind

ladders are my help for the day..

IMG_1800

see it clearer in this pic

IMG_1801

some ropes either end tethered, i then lower each end a bit at a time, its not that heavy being softwood but i’m getting some rope practice for the main event

IMG_1803

IMG_1804

revealing the oak beam, needs  a clean but looks like it’ll come up good

IMG_1805

need to cut back some of the roof overhang to make it flush ready for the Bardage (cladding)

IMG_1806

so out with the sabre saw, brick bit for the cement boards

IMG_1808

and the change the bit to cut off all the joist ends, voila, flush!

IMG_1807

next up in preparation for the new oak posts, i need to cut the wall back to let it slot in next to the other oak post

IMG_1809

threw in an extra support as the joist is only sitting on an inch of its end, and its supporting allot of weight in the roof, you take more precautions when nobody is around

IMG_1810

nice straight line but shy of where the beam will sit so that i can expand foam the gap

IMG_1811

1 x 4m long beam of 9″ square oak, about 160kg, the bigger of the two needed so tackling this one whilst its early enough in the day that I feel up to it

IMG_1812

the trailer helps, its a great platform to cut it to length on + I can manoeuvre it into position easier

IMG_1814

a selection of straps, ropes and a 1t block n tackle, guide rope attached to quad, as it raises I can let the quad backward to line up properly.

IMG_1815

bit by bit I get there

IMG_1816

I cut it a little too long deliberately (honest) so i could cut the joist for a neat tight fit, i’ve notched out the joist in this pic, bit blurry as camera was feeling up (bit cold!)

IMG_1817

strap to harness and the bang away with a big hammer, very neanderthal, just up my street 😀  attached to the top is block to absorb the impact of the sledge hammer, up and down the ladder hitting top and bottom but by bit

IMG_1818

all in, needs a clean but fits well

IMG_1820

onto the other side, this ones much smaller so can be man handled, last bit of cutting via bow saw.

IMG_1821

intended location, the area between these two posts i intend to render and is much easier to get to before the post goes up so I decide to render first, so I put corner beading on all the necasary edges.

IMG_1822


rendered and post plonked in there, it has some fantastic graining and weathered surface, it’ll look good sand blasted later on..


DSC00610


well thats another week down, somewhat hampered by the breakage of the JCB, a job that would have taken half the time with the olde girl in tow, hey ho, it was nice to get inventive in a way they had to many years ago, part arrives today so oily fingers at the w/e.

didn’t change the result and that’s the main thing, decking comes to top side of bricks so we get a constant flow from inside > outside, it’ll be a complete glass rear the view from our bedroom is really quite nice, looking forward watching the animals come to life in the morning 🙂 I’ll wait till Spring to post the view.

DSC00615


Beaming Oct 2013

_MG_7050_2

Sun’s out so I feel compelled to do some more roofing, it seems to be in my blood now..

just an ickle roof on the ‘to be’ luxury bathroom, hard to believe seeing this, all tiles off

knocked down some walls to open it up a bit

having taken down the dividing wall which was supporting this central beam slightly, we’ll need  to install a BIG beam instead, there’s one i’ve been eyeing up for a while over in the gym, the one pictured here is far to spindly to be exposed and look any good, never mind being insufficient, the replacement should look far more appropriate

this is it, pretty much doing nothing but looking pretty

I know its the gym & I really should have practiced my clean & jerk with it but I was tired so enlisted on Big Birtha (JCB)

jet washed, turns out the longer of the two & the one I shall be using, is in fact Beech (very light) but still very attractive grain to look at whilst lying in bath smile

already has a great arc to it after years of supporting itself & not much else that i could see, its got some cut outs and mortices that need attention so give it a couple of days in the sun and I’ll tackle them

et voila! worked area should dull back down given time to match the rest of the beam

back at bathroom & readying things to take the beam

as it turned out it was easier to remove EVERYTHING, it needed all planing back to natural timber anyway, much easier at ground level, supports will be cut off and header will be planed back and sit atop new posts/uprights that go all the way to the floor

ply removed reveals old metal window, this comes out and will be replaced with a timber frame that’ll be clad on the outside with err ‘cladding’ smile

onto the new uprights & a need to recess them into existing wall, they’ll sit on top of a limestone pad, stops rot & termites, so cutting out wall…

not gone all the way to the bottom as this is the height the stone will sit at, post will sit half on wall half on stone

recon on the farm to find things is always good fun, Tia likes to help, she found some great stone smile cutting them is very similar to working with wood, quite like masonary work, even if it does leave you looking like a ghost! well, its Halloween smile

a shelf on wall needs removing to make things flush for render

foot stones in place, decking should come about halfway up

centre beam in place & one of the new uprights sat on stone, it looks like its sat on top of upright, its not, just an illusion…

this gives better perspective front header in place now and offered up one of the rafters to get centre beam height right

all rafters in place, I’ve cut them back to only have 1″ overhang as I want to see header etc when guttering is installed

there was enough length on upright to allow me leave have a lip for header to sit behind, I shall the drill through front too back and use an oak peg for an authentic look.

pleased with how its transforming so far, should actually be something interesting to look at when sat on decking

onto roof, boarded overhangs, under felt will go over the top of this but under the battens as these will be seen from underneath outside

air bricks to fill in recess on wall ready for render

concrete blocks for building up and filling doorway

et voila!

cement panels added to roof, we’ll then stick old roman tiles (of which we have more than a fair share) on top but not in the valleys, looks really authentic but fully sealed with no movement underneath, looks nicer than the mechanical tiles even like this, there is a window (obviously) to left and you might be able to see the padstone for the third centre support post, this’ll also have 45º supports branching off to meet header.

clad the ends

original ‘hand made’ canal / roman tiles added to cover cement boards

added some decorative supports to the beams and the window.

this is it for now, vast improvement

photo_2-2

wall lights up, should look nice at night..photo_4

photo_4

It’s EElectifying! Oct 2011

8271079240_4f599ff942_o

we have to Install Internet but no telephone has ever been installed at the farm so this will mean negotiating new telegraph poles on the Chemin (street) via France telecom , up to the point of entry to property where upon ALL cables must go underground, so, 250m of trenches to be dug eek so got a little bucket for JCB but the farmer who farms our prunes has one lying around thumbup

bucket straight to work, no real hurry I dont think as the poles going up could be some time, but I get digging anyway..

the overall plan for underground electrics

start point is behind this photo (A) and runs toward farm

comes round the corner then this way past the BIG barn & toward Ma Chaleur

this is point ‘A’ where it all starts, this main post will stay, all others on site will come down eventualy

our first contact with France telecom was in March, 3 months, 4 visits later, much scratching of heads & mysterious disappearing orders results in some poles!

no more visits to McDonalds to order on internet (good coffee though) = less petrol costs & more time to work on farm bounce

however, digging the trench for the telephone line does mean we have to tackle the underground electrics to, as they will run in the same trench, damn! another heavy learn! (that’s a good thing apparently!)

we are 3 phase electrics (need to be for some of our demands) so a balance across the 5 buildings & 250m run needs to be calculated, after many strenuous image exchanges with our electrician we figure it out, basically a 250m run of 35mm cable eek how much!! we get it ordered & it arrives, the roll arrives on big wooden cotton reels that weight 150kg each, mmm I dont want that rolling ofver my sandles scratchchin
not the same as UK as they dont use armoured cable, instead it has to be fed through ‘Gaine’ which is brightly coloured tube for protection & visibility when digging, red – electric / green – comms / blue – water / yellow – gas.

you can imagine what its like trying to drag 100kg of cable through the gaine, they do supply a nylon thread already woven through the gaine so you can pull through cable but its woefully inadequate when you get to cable this thick so we have to improvise.

I tie the gaine to the quad then set Gill off slowly while I push the cable through, I loose a few fingers but it works & we now have some electric cable laid, we wont be using it for a while yet though but at least we can get the trenches back filled before the rain comes, if it ever does! typing this I cant remember the last time it rained.

looks nice and colourful

Swallow are busy diving in & out of the BIG barn feeding the little mouths

Baby mice unearthed so we tried to nurse them

regional bird ‘Hoo Poo’ have a very miniature prehistoric looking head, make a lovely sound to

and in Mon Coeur we have bats that will need relocating

reality again..

managed to get everything up to Chaleur, all backfilled and concrete inspection holes every 30m

Fencing needed for Tia, so rather than do something temporary we go about creating the garden for Chaleur it’ll give us another area to relax in through the summer plus it gets allot more shade than the Potager, something very important here (as this week has already proven)

Gill’s going to spread this lot and lay some edging stones whilst i continue with trench passed the garden so we can do fencing

didn’t she do well 🙂

me doing my bit

now past I can tackle the fencing & gates, we will need a concrete border beneath the fence as huskies are very good diggers apparently

bargain bucket gates, need to be fabricated a little though as no locks or hinges were available (reason they were cheap)

new personal entrance for her, laps of the garden, into the house & back out again seem to be todays novelty, wetting the lino for her balistic entry to the bathroom is our game of the day biggrin

gates up & painted, also, you can just about see the white blossom on the prune orchards in the distance, looks like snow silly

laying cable all the way too Mon Coeur at the far end of the plot is all finished

through here

to its final destination

routed in an agricultural pipe underneath the new entrance to the little house, a very cheap backup for us to water our potager, in case the water butts run dry.

getting bigger

Ma chaleur / My Heat.. Dec 2011

8276169053_d25a9a1e7c_o-1well its back to Ma Chaleur to create some winter comforts before the snow
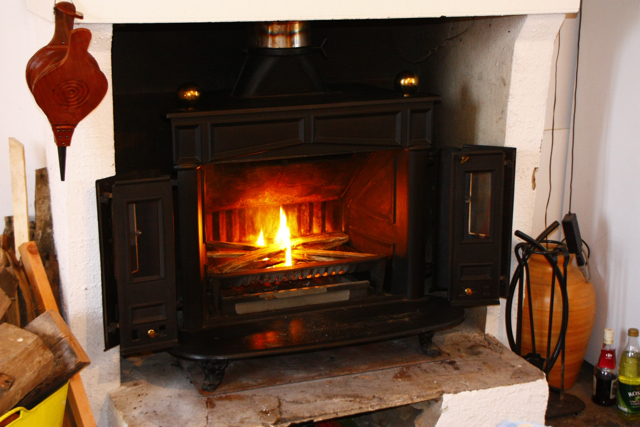
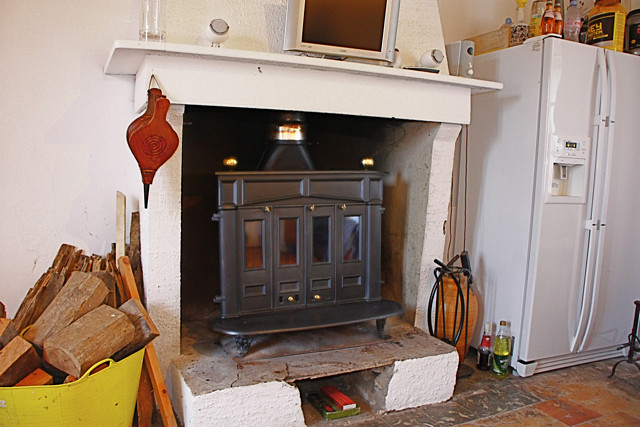
we were very very lucky bounce and found a second hand log burner for sale 10 mins up the road, old cast iron jobbie, 12kw & fits our fireplace perfectly & can be run with the four doors fully open thumbup

we paid £250 eek crazily low, someone was smiling down on us for sure, no more firewood gobbling open fire, it eats 25% of the wood but gives out 4 x more heat, after a very sooty day we’re sitting back enjoying the fruits of our labour.

we’ve had aesthetic fires before, but this is different, when its your only true form of heating it takes on a whole new value cloud9

_MG_0580

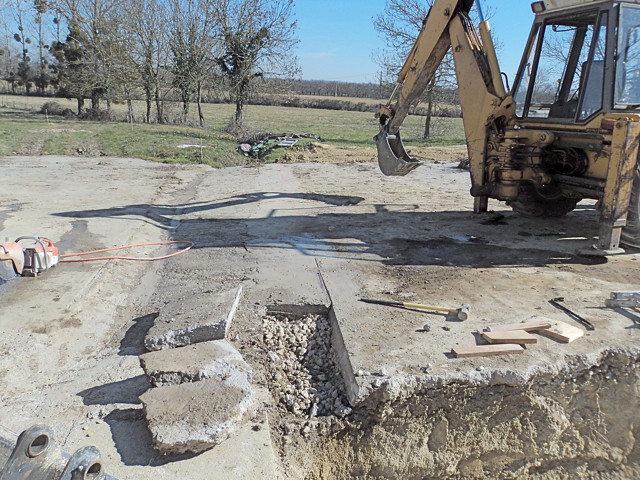
and after 6 months of having to empty a converted mobile home toilet, I finally get a reprieve in the form of fitting a new Fosse Septique (septic tank)

Bac degreaser for kitchen and bathroom white water before it goes to the main septic tank

DSC01839

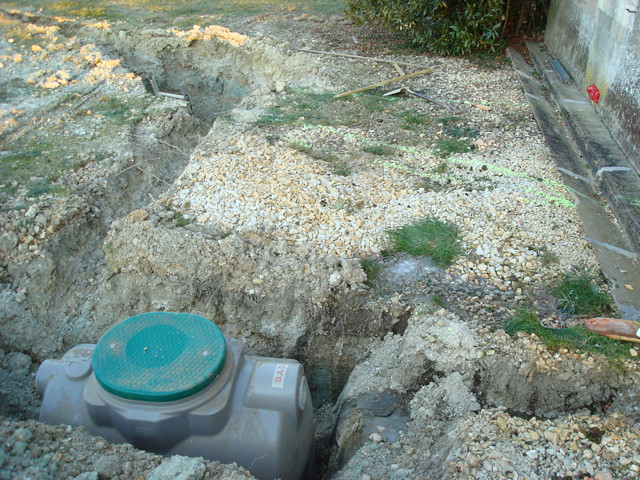
leads to main 3000l tank

DSC01838

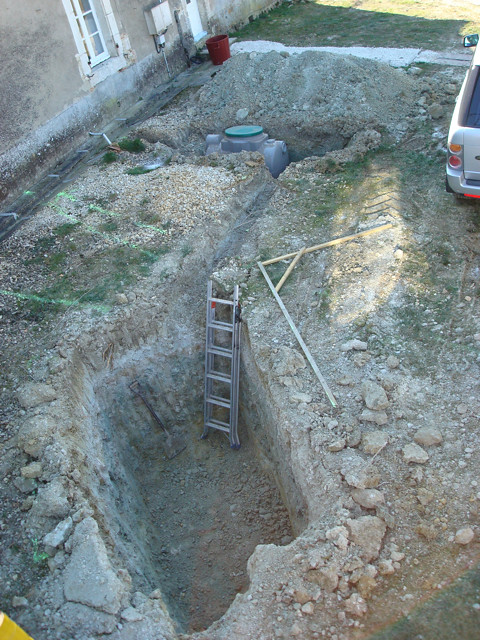
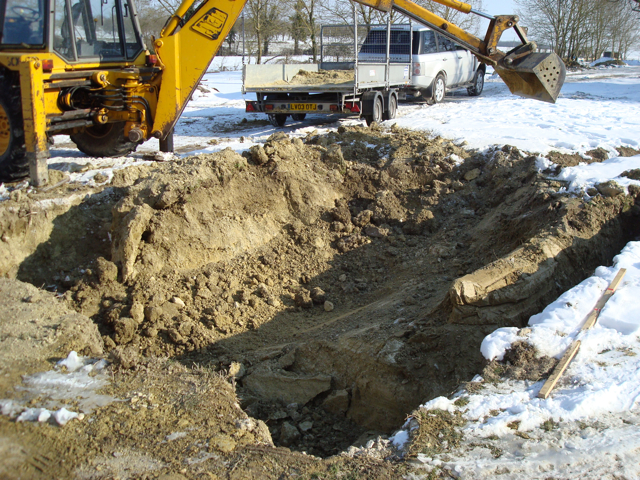
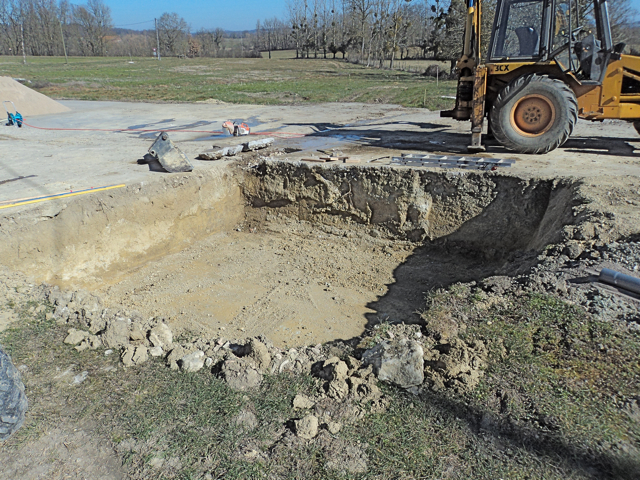
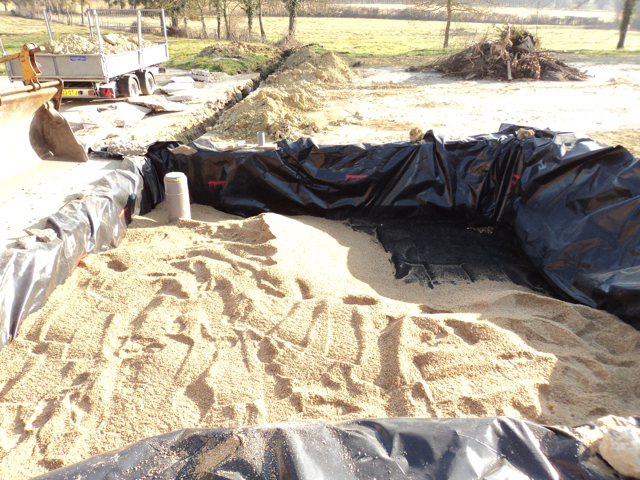
from here it goes onto the sand filter (because we have clay rather than high drainage soil) 5m x 5m x 1.2m, half way through this but the weather is so cold now that it is freezing the ground so hard & thick that cannot penetrate it with the JCB frown

think some time out is needed for the machines tbh, think I need some time out to if the truth be told, we’re hoping for a break in the weather right now, looks better for next week so fingers X.

the temporary toilet systen is freezing up in the temperatures but it seems anti freeze in the loo apres poo does the do 🙂

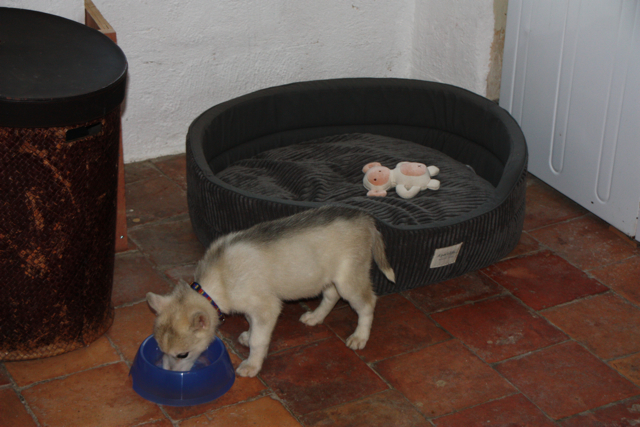
been talking about a new pup for a while now, decided on what we want (Husky) so off to have a look!
he/she would love playing here at the moment biggrin

_MG_1037

_MG_1043

_MG_1035

_MG_1046

found a good breeder for huskies with excellent credentials and show winning parentage, apparently some puppies are due any day, after that we’re looking at a couple of weeks before we can view bounce deposit paid bounce will keep you posted wink

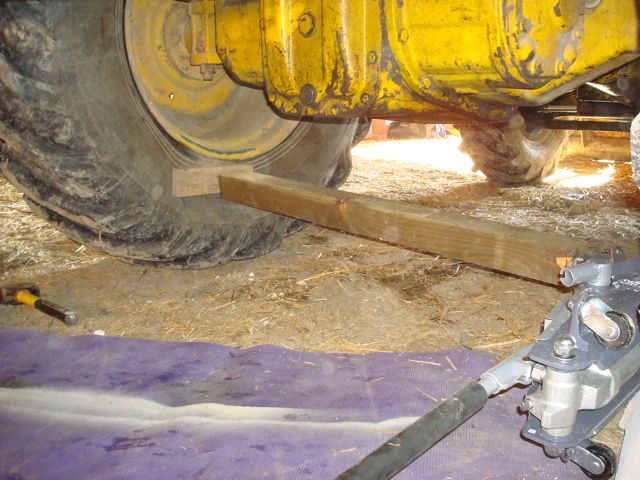
JCB woes 😦 a flat tyre found me hunting for a reason, seems when i slipped off the edge of some concrete I split one of the wheel rims on the inside! it split the lip of the wheel & tore it up at 90 degreeseek at the same time i think the inner part of the tyre was pushed to the centre of the wheel thus letting the tyre down.

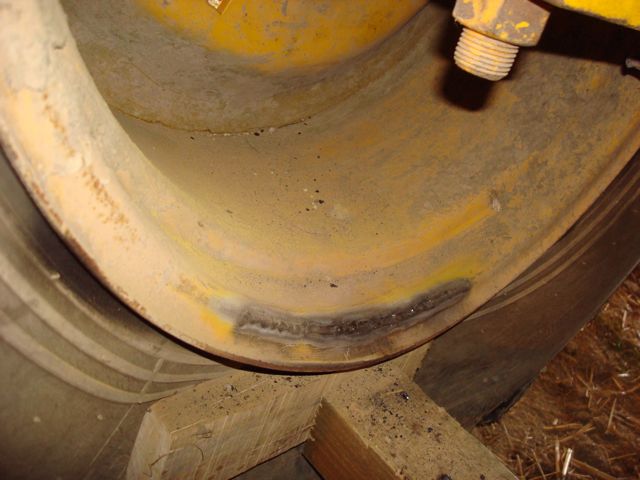
I pumped it up with everything as it was (bent out) and it held pressure so thought a simple hammering of lip back into place & running a seam of weld along the lip might do the trick.

this is it hammered back into place & wire wheeled ready for welding

DSC01894

improvised trolley jack to push tyre away from point of welding

DSC01892

no awards for the welding (I couldn’t get comfortable is my excuse biggrin)

DSC01895

DSC01896

wasting no time getting her back to work

timew to dig the 5m x 5m sande filter, the last stop for all the waste water before it just runs into the ditch

DSC01899

excess earth used to build up new driveway at Mon Coeur

_MG_1079

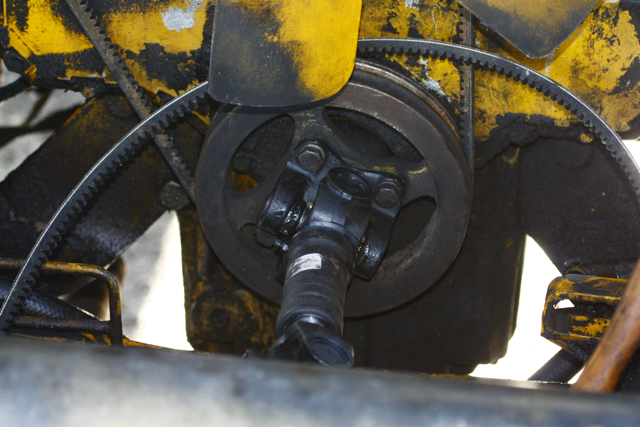
the JCB disaster again, failed UJ for hydraulic pump

_MG_1053

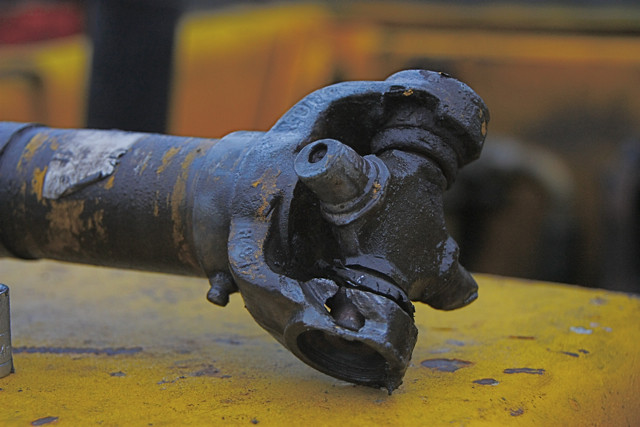
stupidly designed imo, the oil cooler for the transmission runs across the top of the drive shaft at 90 degrees with about 20mm space between them silly so you guessed it….

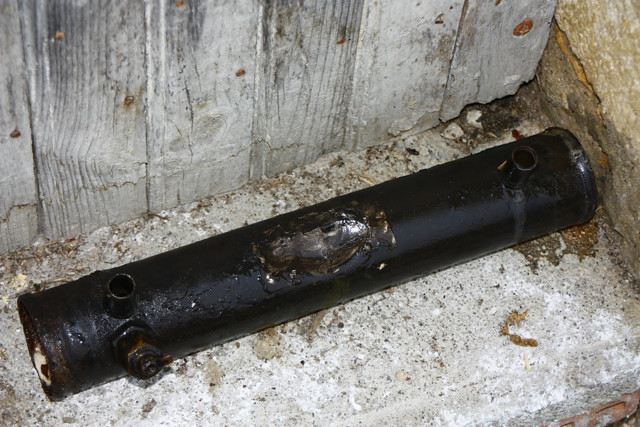
one destroyed oil cooler which lead to transmission oil mixing with water, now both the water system & transmission oil system needs to be drained, flushed and re filled along with new parts fitting roflpaperbaghehe wouldn’t mind but I’m trying to fix it in a record breaking  -15º fek fek fek!

Munched oil Cooler

_MG_1060

_MG_1058

new oily prop shaft, fitted new fan belt whilst at it as the propshaft runs through it silly thought it a good idea to fit a spare at the same time (actually I read it on JCB forum hehe) but yet to be tie wrapped out of the way.

_MG_1158

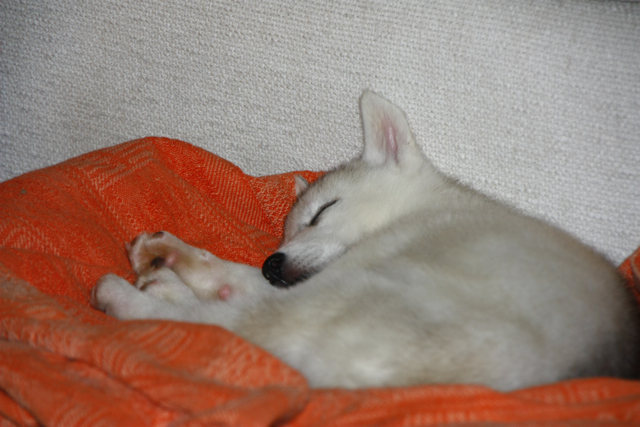
feeling more inspired myself as of yesterday smile ‘Tia’ (female Husky) is now part of our epic (to us) journey….

IMG_1105

IMG_1101

_MG_1130

_MG_1115

_MG_1108

_MG_1165

finishing Fosse…

_MG_1325

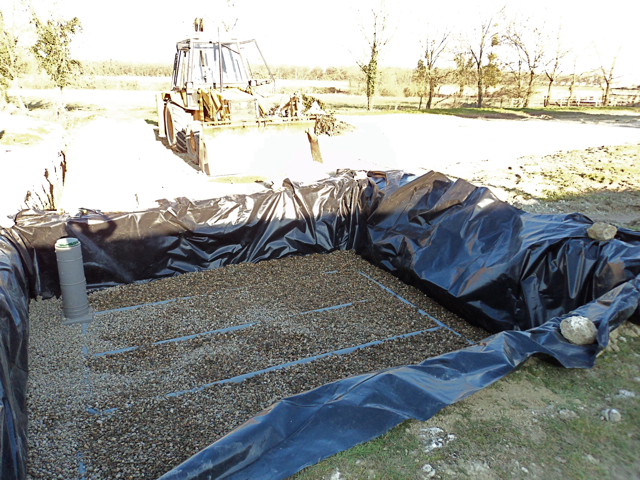
from here the treated water runs into the ‘sand filter’ basically the water enters the top of this plastic lined, sand filled pit, seeps through pipes with holes in, falling through the sand & gravel with a ‘Geo textile’ film, this filters the water once more & is collected at the very bottom to be then drained off to suitable area, which happens to be the other side of concrete frown so i’d better get cutting..

DSC01885

DSC01888

DSC01884

DSC01891

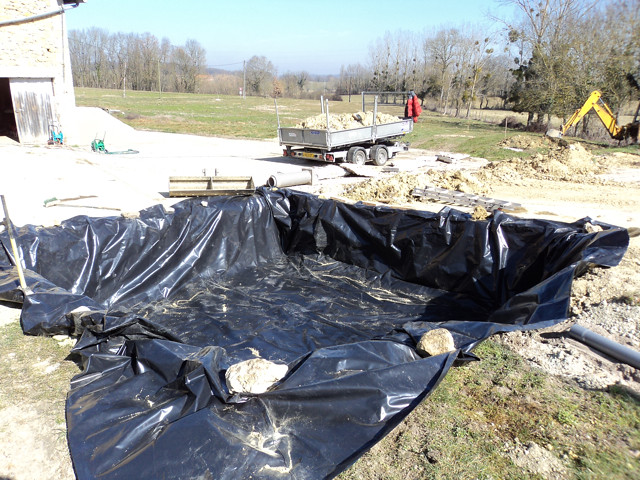
first thing in is the inspection tube & exit pipe right at bottom, said pipe has to be mechanically sealed through liner, after working on the jCB its a pleasure & no different to Mecano, bit warm in the black plastic hole on a 24 degree day hehe in no way complaining though cloud9

DSC01893

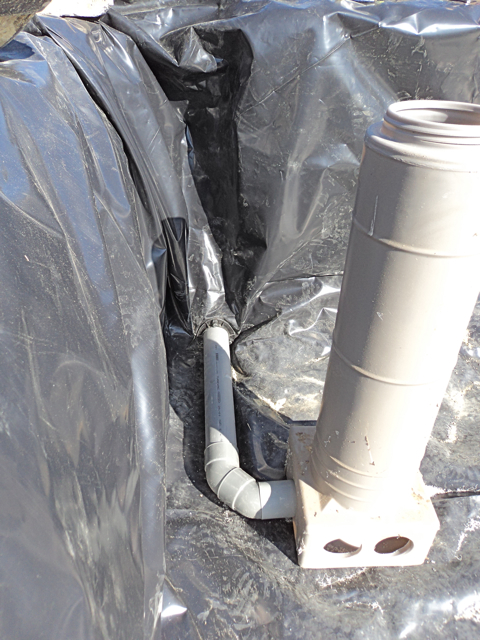
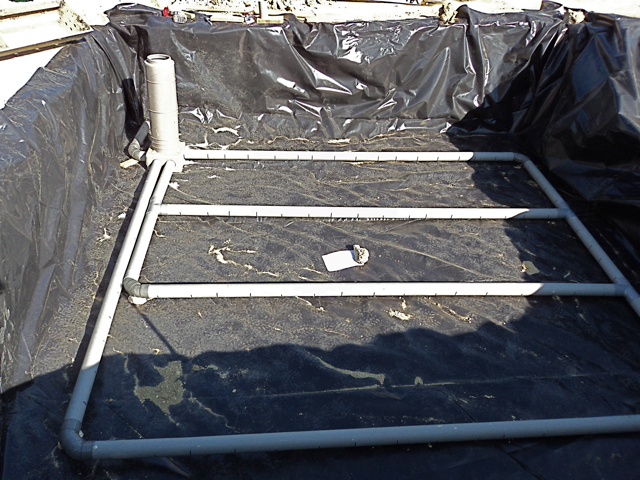
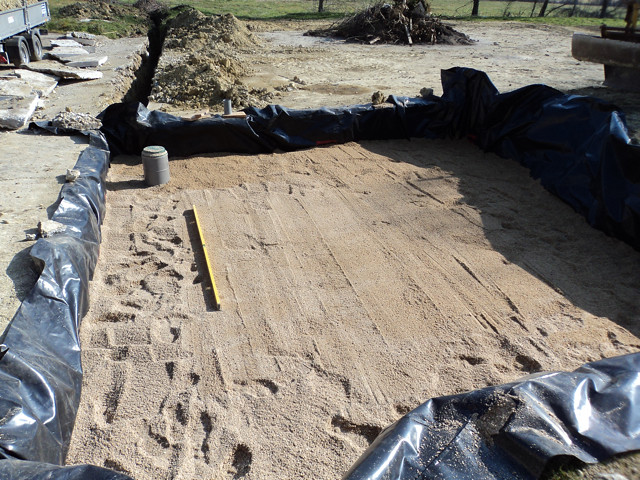
lower distribution matrix

DSC01895

exit pipe 5ft down under concrete

DSC01896

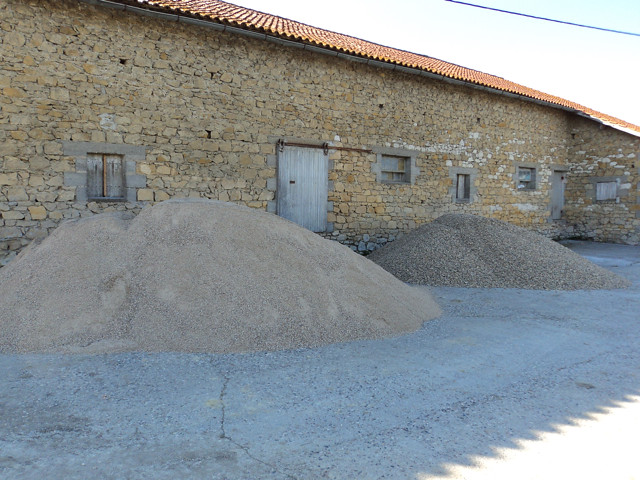
30 tons of aggregate, sand & pea gravel

DSC01886

gravel in on top of pipes

DSC01898

sandals and slippers taking a bashing

_MG_1504

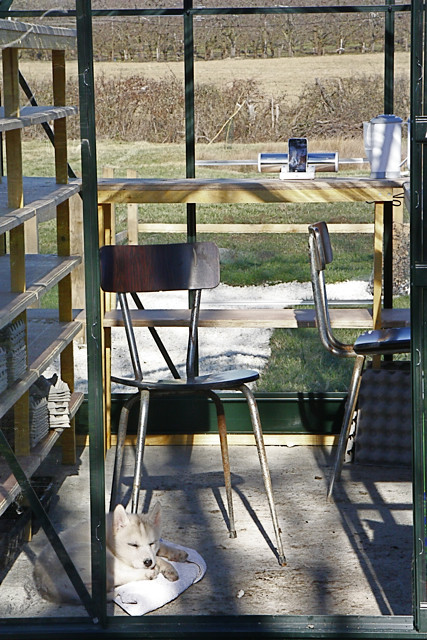
but she’s very happy 🙂

_MG_1520

as are we

_MG_1478

back to reality

sand in

DSC01905

levelled off ready for next layer
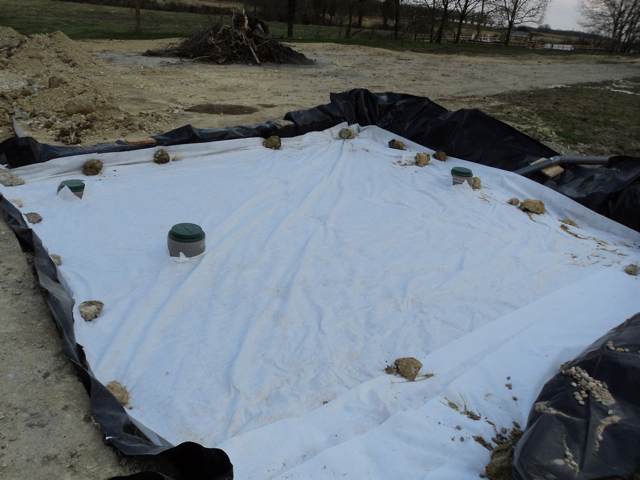
DSC01906

DSC01907

top matrix

DSC01910

covered

DSC01913

geo textile membrane seperates this layer from the last layer of top soil

DSC01914

DSC01915

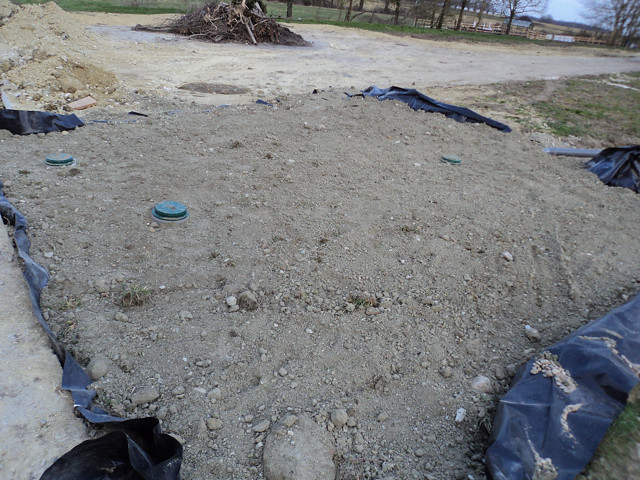
all connected up over the weekend we finally have a proper sewage system bounce the luxury of being able to flush without having to count down to the next trip across the fields with a bucket of pooh, was ok in the summer but the winter trips left me feeling like scott of Pooptarctic eek

these chaps were out again this morning cloud9 Tia will have great fun chasing them

_MG_1390

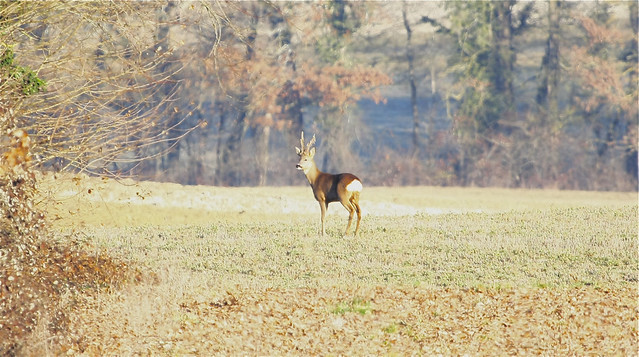
under the watchful eye

_MG_1534

_MG_1528

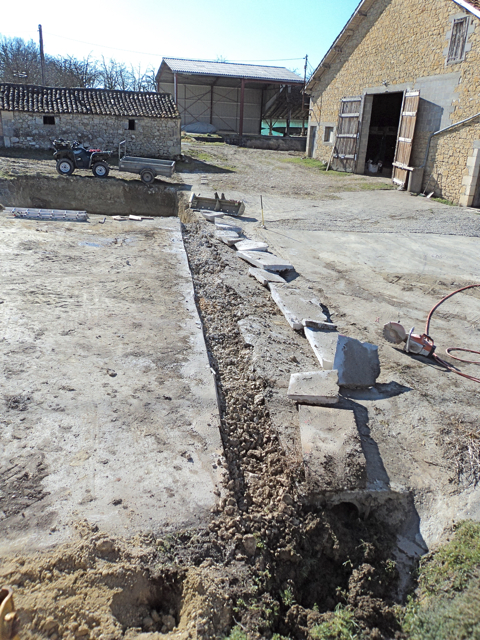
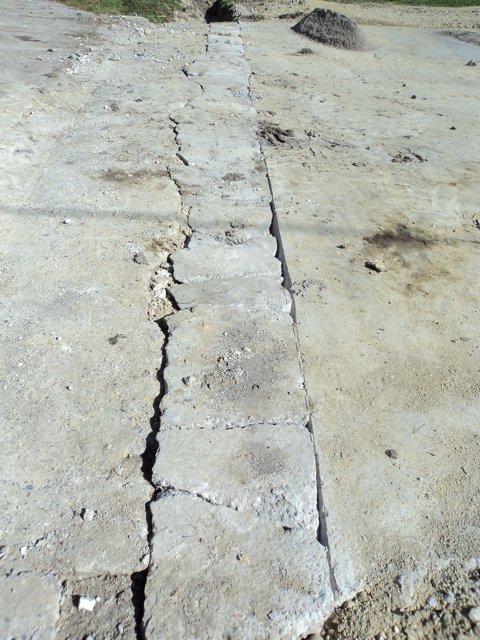
laying concrete back down, then forced into soft soil below ready for reinforced top layer to be laid

DSC01934

DSC01947

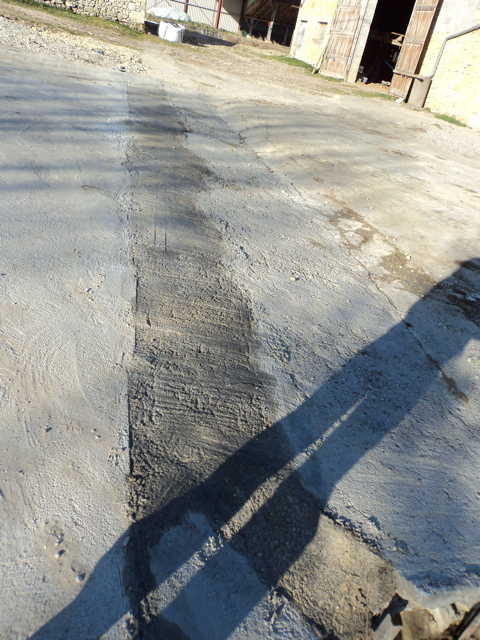
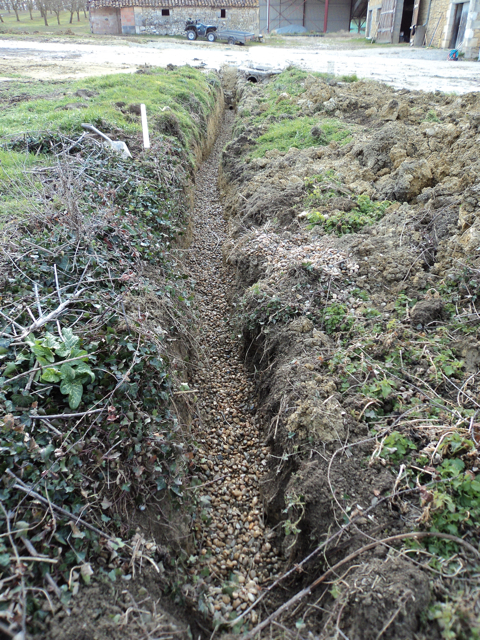
dispersion trench dug to receive gravel, you can just about see the pipe arriving from the sand filter that passed under the concrete at the far end 

DSC01922

bit knackered after all that tbh, been at it 14 days straight trying to make up time lost in cold weather and JCB breakages, so some time in the potager is in order, Gills not been idly watching me, she’s been working hard digging over our central flower bed display that was 8 inches thick of agro grass, I admire her tenacity to get things ‘just so’

the right mix of manure, top soil, compost etc etc eek there will be stepping stones laid in amongst so Macro photos are poss, specific plants planted to attract the creepy crawlys bounce

DSC01930

Cranes are returning, a beautiful sight and noise, we’re not really on their flight path so have been quite lucky, lovely way to finish the day seeing these guys fly into the sunset.

_MG_1594

_MG_1583

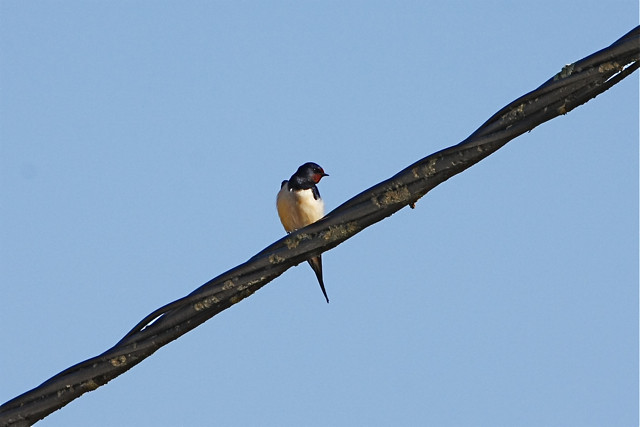
In light of the Cranes returning, another welcome return this week has been the first Barn Swallow, it’s incredible to watch their acrobatics & their return to the same nest they’ve been using for years. One solitary bird arrived today, over the next 2 weeks they will be many many more, they are a very welcome sight & sound that really brings in the new season smile

_MG_1830

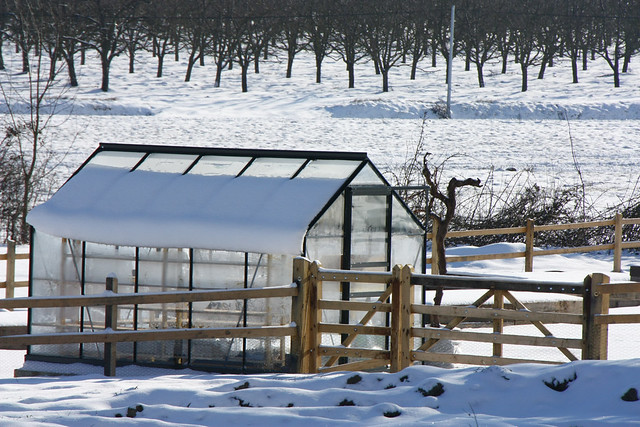
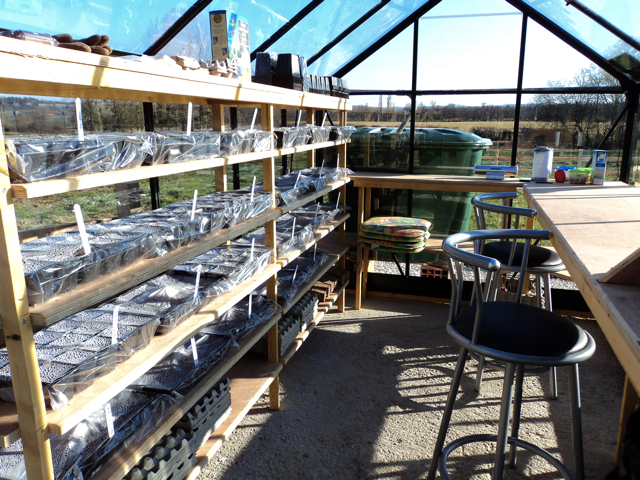
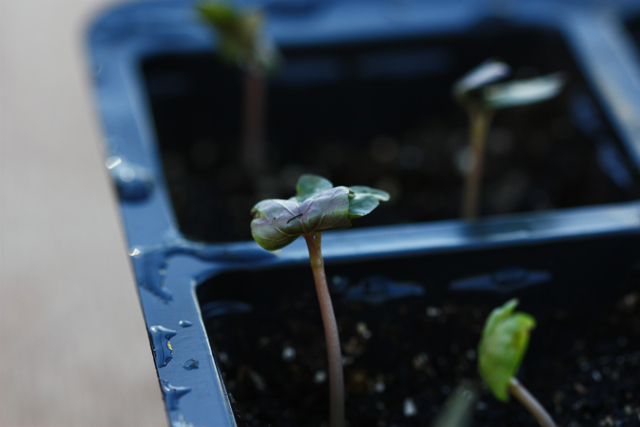
Still in the Spring theme, Gills been hard at work making use of the shelving I made for the greenhouse, hundreds and hundreds of little seeds planted a week or so ago, 3 types of Chillies, red, green, yellow Jalepenos, Asparagus, Cauliflower, Brocili, tomatoes, onions, chives, the list goes on….. 

DSC01965

_MG_1839

compost bins working well

DSC01982

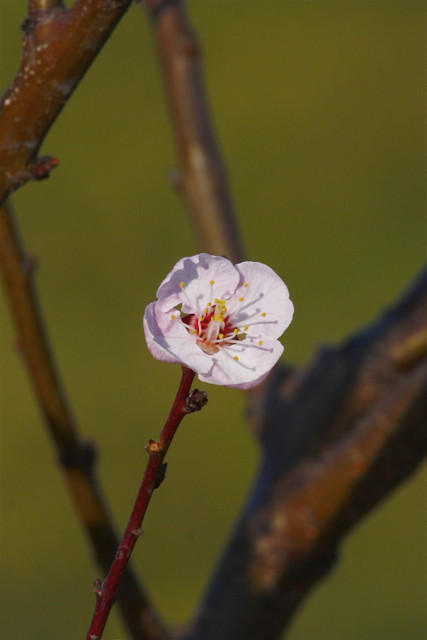
One of our fruit trees proving to tough for the -15 temperature biggrin Apricots at least are on the way smile

_MG_1804

_MG_1806

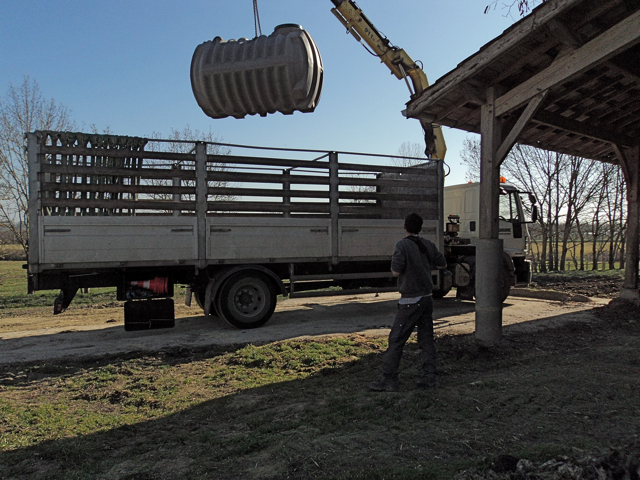
next fosse for Mon Coeur being delivered

DSC01975